|
Flyaway
by John Foster fosterjohn@webtv.net
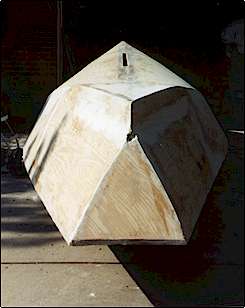
| I started building Flyaway the second week of January 1998. Two
weeks before beginning, I saw the design for the first time. I had never built a boat but
had some wood working skills and had been studying and thinking about building a sailboat
for several years. I've also sailed on and off since I was a teenager. The simplicity and
great lines of Flyaway appealed to me very strongly. |
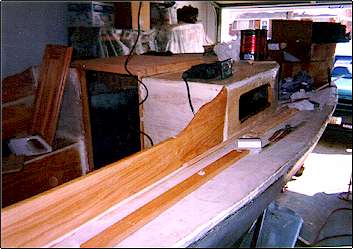
My Flyaway is a prototype. The construction methods
were created by me because there were none spelled out and as far as I can tell my Flyaway
was
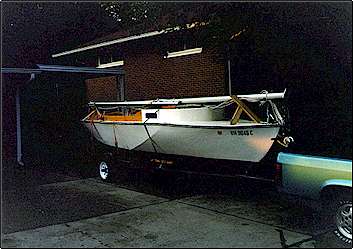
the first, other than a 10-foot version built on the west coast. I built this in a one car
garage in Ohio. I now live in Omaha and the boat is moored on the coast of Maine. |
|
|
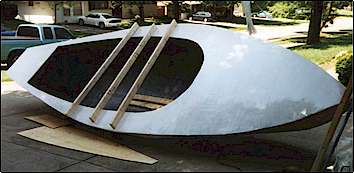
I started by converting the dimensions on the blue
prints to 4'x 8' sheets of BCX 3/8" plywood. I used heavily reinforced butt joints to
create the long bottom panels. I joined the two big bottom panels up to about a foot from
where the bow started to turn upward. |
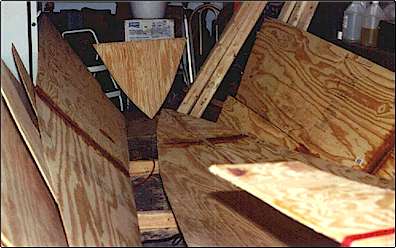
The plans I have don't tell much about how to build
Flyaway, so the bow
became a challenge due to the fact that while pulling the panels together from the bottom
up they were being bent quite severely. I used ratcheting cargo straps around the hull to
pull the panels together beginning at the bottom of the bow and applying glass, sheet |
|
| rock screws and thickened epoxy one foot at a time. allowing
things to set for at least 24 hours before moving up. After about a week of patiently
pulling the plywood together the bow was done. |
|
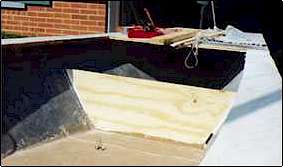
The front deck was built separately from the hull
with about a 3" crest by laminating two 1/4" sheets of ply into the dimensions
described in the plans. Attaching the front deck to the hull, again entailing the use of
the cargo straps to pull the hull sides in to butt up against the deck. |
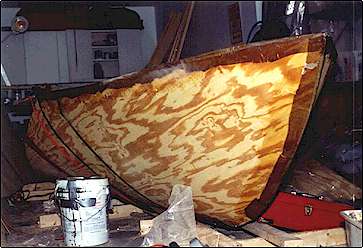
| At this point I had done what they say you can't do with
plywood, I had bent it in two directions at the bow. I now know why they call it tortured
plywood! |
|
Once the bow was together and the front deck
attached, things moved along nicely. The rear side panels were attached at the angle the
complex seam would allow for a clean fit, starting at the deck and working toward the base
of the stern. I had also cut the rear side panels as closely to the
blueprints as I could to allow for the rear transom that was sketched in the design
instead of the canoe stern. the shape of the rear transom was mostly an interpretation of
the plans and what looked pleasing to me. The underwater lines are not affected by the
transom because it sits above the water. |
| The decks were then lofted and cut to the
dimensions in the design. The rear panels were pulled in to meet the deck, keeping the
shape in the blueprints, and epoxied in place. |
|
|
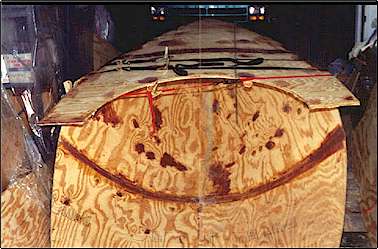
Once the decks were attached, the entire inside of
the hull was glassed, overlapping at the seams and using 5 ounce glass. I added black
pigment to help me see areas that needed more epoxy or glass. The hole for the keel was
next, cut at the location in the plans. |
| I then rolled the hull over and started reinforcing
the outside seams with another layer of 9 ounce glass. The hull then received two layers
of 9 ounce glass, again overlapping at the seams. The next stage was several days of
fairing and sanding. |

|
|
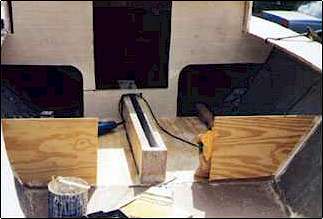
After the hull was upright again, I attached the
keel box and built the cockpit floor with 5" of foam underneath. The cockpit was made
larger than
the plans to 8' long, centering the bulkhead over the forward stress area of the keel box. |
| The seating was built with 15" of back support
and storage access provided under the rear seat to the stern area. I used oak for the rear
coaming and hatches because it was easy to get and cheaper than other hard woods. |
|
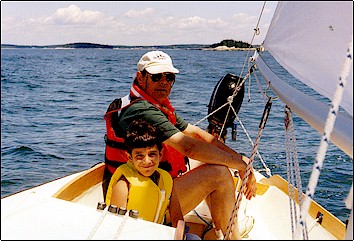
grandpa and grandson in 10-15 knots
beating windward
|
The cabin doors were from used kitchen cabinets
(oak also). I rigged her strongly using Dwyer spars. West Marine built the shrouds, I used
Harken block and tackle, and Sta-Set for the halyards and sheets. The sails were ordered
from CSD. I also bought a used drifter. |
| The trailer was well used. I rewired it, painted it
and added new bunks and rollers etc. The swing keel was cut from a 1" piece of steel
from a scrap yard and the pin is 3/4" stainless steel. Lead was used internally
around the keel box for ballast. Later, after a test sail, the ballast was brought up to a
total of 600 lbs. The hull itself weights 1200 lbs. un-balasted (lots of epoxy and glass). |

|
|
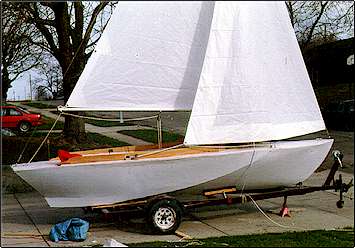
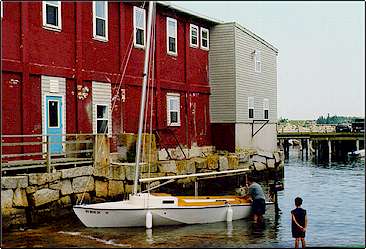
The Melissa V was christened and
launched July 4, 1999 in Stonington, Maine. She sails extremely well; the helm is
well balanced and she beats upwind with hands off the tiller when the sails are properly
trimmed. The 225 square feet of sail push her along easily in light air. |
| The shape of the hull slides through chop smoothly
and rarely pounds. She is still initially tender even with all her internal ballast,
though when heeled she hardens up well. She can carry full sail in up to 15 knots of wind.
She also self-rights well, as we found out after we buried the coaming in 25 knot gusts
and white caps with full sail up. |
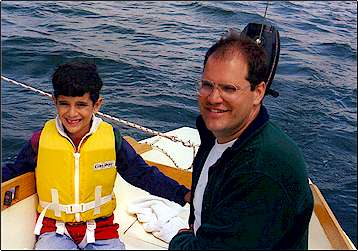
my son and I in light winds
|
|
I plan to stiffen her up by cutting a window in the
keel and filling it with 2" lead from inside the bilge and to widen the keel box to
fit. This will put the weight down low where it belongs. |
| Overall, I am quite satisfied with Flyaway. The
building of her, based on the plans I had, required a lot of creative thinking, though
she's very simple by design. She can be built by anyone with a little ambition and
patience. |
|

|
