|
A JOURNEY TO CREATIVITY
BY STEVE BOSQUETTE steve@portlandinsurance.com
| Creativity is a wonderful thing. Where does
it come from? Why do some have it in abundance, and how can we get more? These are all
rhetorical questions of course. Some of the happiest days of my life have been when I
could be creative in some form or another. Most recently it has been by designing and
building a boat, but not just any boat; a SCHOONER! |
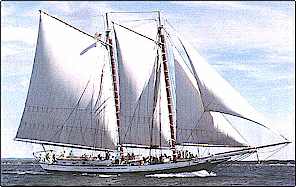
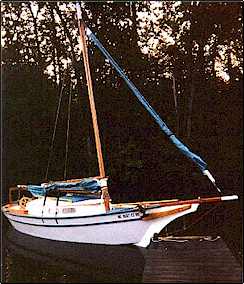
The Schooner Grace Bailey
|
| This recent event began last spring when I was feeling my
Catalina 22 "Sea Rose" was getting smaller, you know that affliction
"Biggerboatitis". My wife and I do weekend cruising here along the Maine coast,
mostly in Casco Bay. The boat is a good sailor but is limited in accommodations. We do
manage to go on a week long cruise each year to Penobscot Bay some 50 or so miles up the
coast. I was thinking of selling it and buying a larger boat. I started looking on the net
for boats for sale and stumbled into John Khonen’s site, "The Mother of all maritime
links page". You can get lost in that site for days! About that same time the
reality of college expenses, for my daughter Susan, hit home dramatically and we decided
to postpone the sale of the boat. |
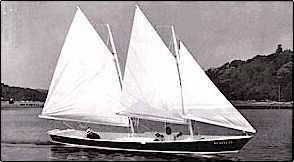
Folding Schooner
|
This left the juices flowing still and I became
hooked on the net! I started spending a lot of time finding and perusing boat plan sites.
I was looking for schooners to build. Although the ones I found did not solve the bigger
boat problem, I became obsessed. |
| Having been born and brought up on the
Maine coast I was smitten by the grandeur and grace of the schooner rig. But I discovered
very few designs for schooners. Phil Bolger has inspired me for years with his unique
designs and I almost built a "Folding Schooner" some years ago, but I never got
around to it. |
| The saga continues! I used a search engine to find
sites about Bolger designs. I struck pay dirt when I found "The Light Schooner" site.
What a nice boat. I read everything I could find. After many hours and much consideration
I decided that it was too narrow and carried too much sail for my wife’s
sensibilities. So I traveled on. |
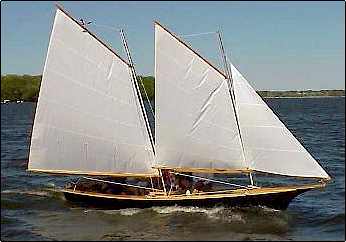
The Light Schooner
|
| I found the book "BOATS WITH AN
OPEN MIND" by Phil Bolger and bought it. I found two schooners in it; "THE
SINGLEHANDED SCHOONER" and |
The Singlehanded Schooner |
"THE SCOW SCHOONER". The first boat was
too small, very narrow and shorter than my Catalina. I faxed Phil to see about the
availability of plans for the scow but he said the design never went beyond the concept
stage. So here I was, left with building the "LIGHT SCHOONER" or the
"FOLDING SCHOONER" neither of which met my needs exactly. |
| The next step was to find a design that
I could adapt a schooner rig to. I found a wonderful site, Stevenson Projects. |
| Their site has a section called pocket cruisers.
The boat that interested me was the "Vacationer". It is designed after the
Friendship Sloops which originated here in Maine. It has captured the essence of the sloop
including the clipper bow. The construction technique is easy, so I bought the plans. I
E-mailed the designer, Mike Stevenson, about developing the schooner rig for it and he
thought that might be fun! While I was waiting for the plans to arrive I was having second
thoughts about using someone else’s design and modifying it. Then it hit me that
since I had designed and built a number of boats before that maybe I could develop a
design myself. So I did and time will tell how it successful it will be. |
Vacationer
|
THE DESIGN PROCESS
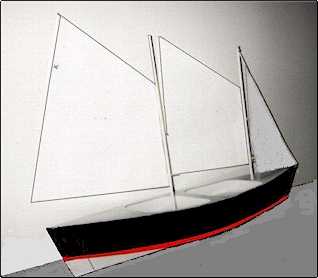
Model
|
In my web travels I came across a hull design
program by Gregg Carlson. It is
freeware so I downloaded it and began to design the hull of the schooner. It is 23 feet
long, 6 feet beam and double ended. I have always loved a double ended boat for the grace
at which it goes thru the water. I like the full keel on the Stevenson designs so
incorporated it in the program. The program calculates the center of buoyancy and the
center of lateral resistance. I also gives the area of the lateral resistance. |
| When it "looked right" I
sketched the schooner sail plan, located the center of effort of all sails and overlaid
the sail plan onto the line drawing of the hull, remembering to lead the center of effort
in relation to the center of lateral resistance. Theoretically the boat should sail well
balanced. The fun part of designing a prototype is to anticipate the launch and see if the
thing sails well. If not I’ll experiment with the configuration until it does. Since
my ultimate goal is to offer plans for sale for a line of homebuilder schooners, I became
more creative and made a web site for the idea. It is called Curtis Schooners and can be
found at https://www.portlandinsurance.com/cs
. It was great fun building the site and in the meantime getting to know our own Chuck
Leinweber who was of great assistance and encouragement. |
THE CONSTRUCTION PROCESS
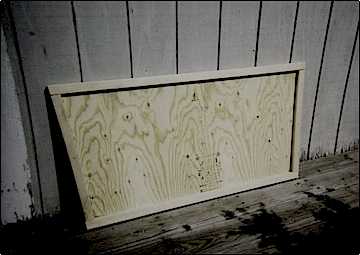 |
With all that in place I was chomping at the bit to
start building. I used ¼ AC X fir plywood for the web sections and 1 ½ x ¾ spruce for
the web reinforcements. I cut the appropriate notches for the chine logs and sheer
stringers glued it all together with Dap weldwood plastic resin and fastened all the parts
together with countersunk #6 x ¾ zinc coated screws. |
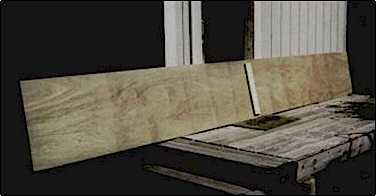
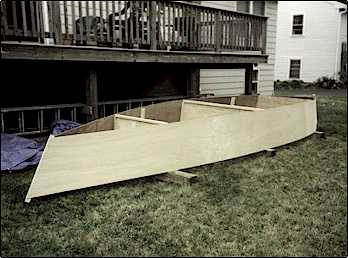
| I designed the boat so that the hull sides were
flat in dimension that is two feet by 24 feet. I takes three sheets of ¼ inch Lauan
plywood to make the sides. I cut the sides and butt blocked them with 1x4 spruce, cut the
angles for the bow and stern. |
 |
| I filled the screw holes and surface voids of the plywood with
Elmer’s Exterior Project Wood Filler, which I found to be excellent for it’s
hardness when cured and it’s easy sandability. |
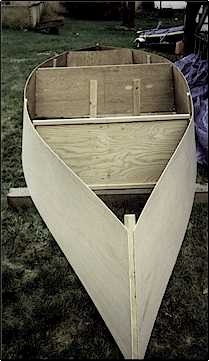 |
Now came the time to assemble the pieces! I mounted
the midship frame on a 6x6 landscape tie and fastened the sides to it using plastic resin
glue and screws. I prepared the stem and the stern post, glued and fastened them to the
sides and all of a sudden I had a boat. The shape was pleasing and I liked it! It sure
piques your interest when a boat arrives at this stage! Next I put the bottom panels on. I
designed the boat with double ½ inch ACX fir plywood so that there would be additional
weight down low where it would help the stability. The benefit , other than additional
weight, of the double bottom is that butt blocks are not needed. I staggered the seams
being sure to mark the locations on the top layer so that extra screws could be installed
to secure the area around the seams for a permanent joining of the layers. |
| This brings us up to date on this "Voyage to
Creativity". Additional pictures of the project are on the Curtis Schooner site for
your enjoyment! I will have a follow-up article for
Duckworks Magazine which will describe other design ideas associated with this schooner
that hopefully will be entertaining reading. I’m sure having fun with this project!
You too can design and build a boat! Sure you can!!! |
 |

|
