|
A
Tennessee in Alabama
by Jerry Van Dyke jvandyke@mindspring.com
(under construction)
Good to hear from you my friend.
After a coat of glass on the bottom, 2 coats of epoxy on the glass, lots of sanding and 2
coats of antifouling paint I was ready for the turning. |
|
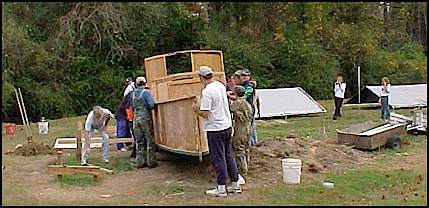
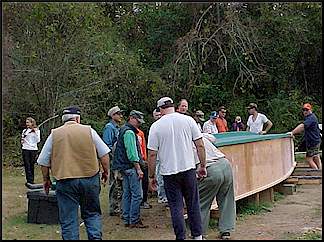
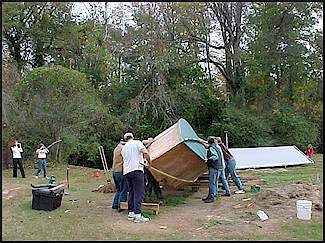
| We turned the boat over Saturday and drank beer and
ate BBQ afterwards before the game. any excuse for a party. I was nervous as a cat
but all went well. Just started on inside of boat today, it is like a whole new ballgame. |
|
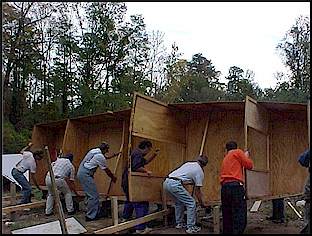
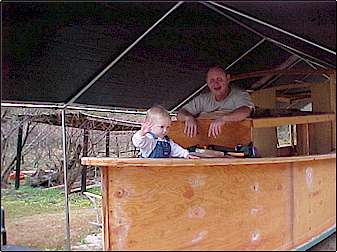
Moved it up to a new
strongback and covered with 2 10x20 shelters like you get from Walmart. |
|
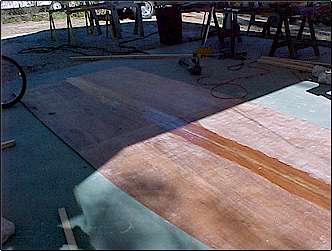
| Weather has been nice until today 1/14/00. Picture on
floor under carport is the roof. Nothing to it. First, epoxy 4 sheets of
ply, let dry one day, turn over, epoxy other side. put 2 sheets together long way,
glass tape side 1, put other 2 together long way, glass tape side 1, wait 2 days, turn
over (needed help) tape side 2. |
| Put on boat with help, measure for curves,
take down and put back on floor. Cut out shape of roof. Use left over cut 6
inch wide x 16 feet to hold pieces together temporarily. I put plastic on the 2 each
6 inch peices and then put the large pieces on the but joint and using 3/4 nails, in nail
gun, nailed roof parts to butt joint piece. |
|
Next I sanded the top and glass taped the 16 foot
seam. Let cure.
Second coat this side with epoxy. Let cure 1 week, and sand. Rip 4 2x4 studs
and put half on top of roof and half underneath and screw them together. (This is so the
seam joint would not break when turning over to do other side) Got neighbors and wife to
help turn over. Pulled off butt joint with plastic covering so epoxy would not stick
to it. Glass tape side 2. Next must second coat side 2 and sand, then will be ready
to go on boat., Nothing to it! |
|
| Other photos are the 5.5 inch gunwales and the
hatch opening. Gunwales took 10 days. Rip 2x6's 1&3/4 inches thick. epoxy,
Clamp first (will call them 2x2's) to boat and attach with brass screws from inside
(always glue with thickened epoxy) cut biscuit holes in piece 1 and then the next outer
piece on 2 foot centers. (Boat has 2 sides) |
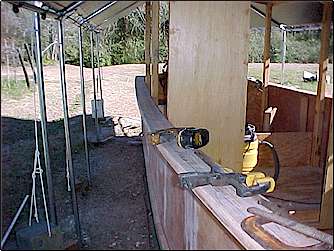 |
| I used # 10 x 3 inch brass screws on 2 foot centers offset 1
foot from biscuits drilled through outer 2x to attach to inner 2x after installing
biscuits in inner and applying glue. BTW, biscuits were to align pieces together.
Now gunwale is 3.5 inches wide. Add outer piece by repeating the screwing and
biscuits. Sand Sand Sand, fillet Sand fillet sand fillet sand. You get the picture. |
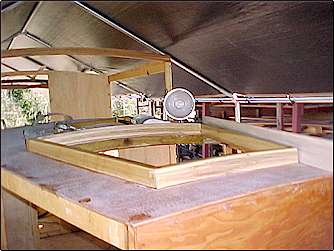
| Hatch opening was fun too. Lip is made from
dried rough poplar that I planed to 1.1 inches. Hatch is more narrow fore than aft.
Top arches, Top also slopes down forward. Looks easy, arched 4 1/2 inch
pieces together for each end of hatch, cut 2 inch pieces for sides fit mark fit mark fit
mark, CUT, Took 3 days. Now must repeat and make hatch cover. |
 |
I am having fun.
Jerry
|