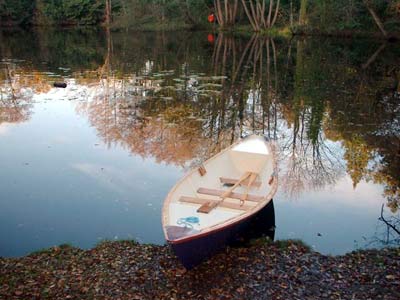
Doris
the Duckworks Dory
free design by Gavin
Atkin
See:
Doris goes sailing
Free for Duckworks subscribers
exclusively, here’s a great small boat for the first or
second-time builder who likes dories, slender boats that typically
row well and carry loads well.
The zipped folder (download above)
contains everything you need to builid this boat, including four
DXF drawings, a .hul file, five gif drawings, various photographs,
and building instructions.
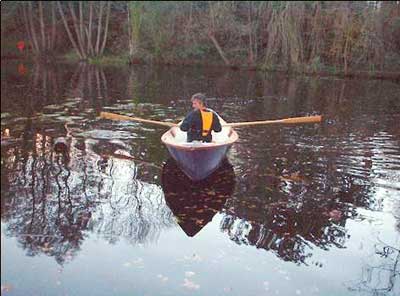
‘Doris’ is a 16ft plywood
dory, but don’t imagine that it is yet another re-working
of the famous – and notoriously tippy – Bolger Light
Dory/Gloucester Gull model.
For Doris has a couple of secrets
tucked away:
•Substantial built-in bouyancy
will ensure that there’s a lot of boat to hold on to in
a capsize, and give you a good chance of re-entering and baling
out.
•A slightly wider waterline
beam and removable under-thwart sand or gravel ballast in bin-liner
style bags. The waterline and ballast combine to make the boat
a little steadier on the water, which many people will appreciate:
existing Light Dories are more than capable of scaring youngsters
and beginners at rowing, but with her ballast in place Doris
will frighten nobody.
Of course, for a livelier ride,
a compentent boat user will be happy to work without the ballast.
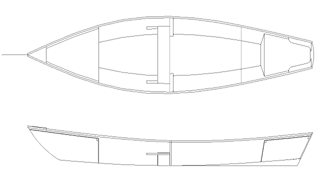
Doris is constructed quickly and
easily using the stitch and glue method, and takes just three
and a half sheets of 1/4in 48 by 96in ply.
The plans are in Imperial-friendly
inches and fractions.
Stage 1
The first task is to cut out
the main panels by plotting a series of coordinates on the plywood
material: you then drive pins into the plotted points, bend
a flexible lath or moulding around the pins, and draw around
the resulting shapes. At this stage you also need to mark the
positions of the frames.
Stage 2
 Scarf
the bottom and side panels on both sides using epoxy and tape,
weighed down under plastic sheeting to make smooth joints. Scarf
the bottom and side panels on both sides using epoxy and tape,
weighed down under plastic sheeting to make smooth joints.
Stage 3
Stitch the sides and frames together
using cable ties, and then, with each end of the boat supported
by a trestle, stitch the bottom into place. After just a few
hours of work, at this point she’ll start to look like
a boat.
Stage 4
Epoxy taping of all the seams,
followed by optional epoxy and glass cloth on the bottom. Then
tape the skeg into place – with good fillets each side
there’s no need to cut any joints to fit this component.
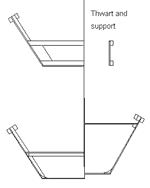
Stage 5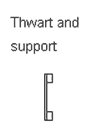
Boat carpentry: assemble and
fit the buoyancy tank tops, make and fit the second thwart support,
run up your fancy gapped inwales and breasthooks. Cut that handsome
dory-style oar lock in the stern.
Stage 6
Finish to taste, and launch…
If you like the water, this is
a boat you will always be able to enjoy: capable and quick, it
rows so well that you won’t miss the lack of an outboard.
You’ll be able to travel further under oars than you may
have previously imagined, and you’ll feel secure and very
close to nature.
Gavin Atkin, March 2003
|