Skimmer
The Poor Man's Whaler
by Dynamite Payson
(Excerpted from Messing
Around In Boats)
(click
here for more information about MAIB)
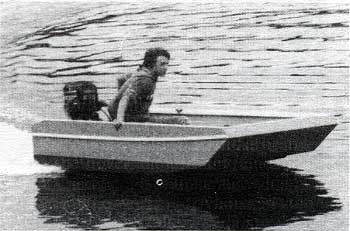
I don't suppose Skimmer would win an award purely
for looks, but for the shortest time between two points she
fills a need, and she does that handsomely. Her total cost of
$50 to $75, which represents the current tab for a couple of
sheets of plywood and a few 2x4s, justifies my calling her "the
poor man's Boston Whaler."
Watching lobsterman Don York skittering around
Spruce Head Island in a similar type of his own design first
aroused my interest in this kind of speedster. Actually, he
turned out a series of variations. His first effort was perfectly
flat bottomed with her forward end turned up like a Sea Sled's,
poor cornering and cavitation spurred him to further experimentation.
At one stage, his chariot was two Styrofoam logs in a framework
bolted to a piece of plywood on which he mounted an old fashioned
wooden kitchen chair. All you could see was Don upright in this
chair, tearing across the harbor like a bat out of hell with
water flying everywhere.
It was one of those things people are sometimes
driven to do for the good of their souls, I guess. You've got
the motor, you've got the materials, you've got the goal. So
you do it. I'm all for this kind of thing, but it's best done
with the aid of a designer. The fun of the thing kept nagging
at me and kept me nagging Phil Bolger until he gave up and designed
Skimmer.
Even so, I had plenty of critics busy making
me uneasy. Brooks Townes, then with National Fisherman,
kept telling me, "You know, you can flip one of those when
you get air trapped under her." I let Phil know of my concern
and left it to him to make the venture safe. When I got the
plans I began to wonder about the effectiveness of the three
skids along her bottom. How much lift would they give and how
much tunnel effect would they provide, as the Whaler's cathedral
hull does, to let the air escape?
An explanation accompanied the plans, from which
I gathered that the combined area of the three 1-1/2" skids
would produce quite a bit of lift, similar, for example, to
the human feet, which have performed successfully as substitutes
for water skis. Anyway, during the trial runs of the prototype,
my son Timothy drove her at a good clip with his 10 horse Mere
and I could see that she cornered very nicely. When he took
her on longer trips, such as out to the Muscle Ridge Islands,
he reported that she never showed any tendency to back up.
Materials
Two sheets 1/4" 4' x 8' AC exterior or marine
grade plywood. Four 8' 2"x4"s for bottom skids, inside
gunwales, transom framing, and bow transom Filler (optional).
20' of 3/4" pine, spruce, fir, or mahogany for chine logs
and seat framing. One 1-1/2" x 5-1/2" 8" plank
for motor support board and bow transom framing. A 5" board
for the bow transom top framing.
1 ib. of 1" #13 bronze anchor nails for
fastening chine logs to bottom. 1 lb. of 1-1/4" bronze
anchor nails for fastening bottom skids. 1 Ib. Weldwood dry
powder glue (or epoxy or marine glue of your choice, it's not
critical elsewhere, but epoxy is best for the bottom skids).
20' of 3" fiberglass tape for chines and
a short strip of wider tape or Fiberglass cloth to cover the
bow transom joint. I qt. resin and hardener.
Oarlocks, oarlock side plates, and 3/8"
x 4" bow eye. Dow Corning sheet styrofoam (blue) for rotation
under seat.
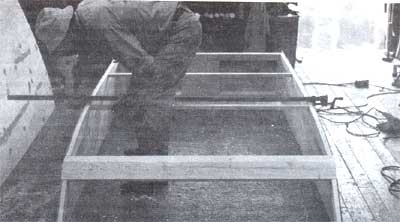
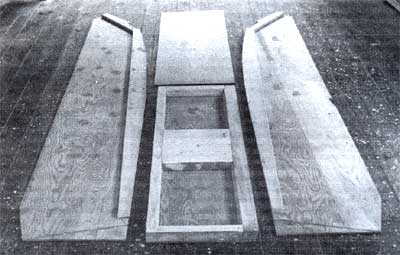
Layout And Assembly
Mark a sheet of plywood at 1' intervals as on
the plan and draw in perpendiculars to use in measuring from
the edge of the sheet to establish the shape of the sides. Define
the curve area near the bow by driving nails and springing a
batten around them. Mark sides for molding, waterline, transom
rake, seat location, and oarlock side plates. Cut the framing
for the top and sides of the stern transom from a 1-1/2"
strip, the bottom framing is 1-1/2" x 2-1/2" and is
beveled 14 degrees.
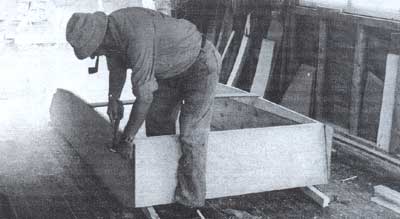
Establish the shape of the chine logs from the
sides. Lay the sides on the floor and glue and fasten the chine
logs to the inside bottom edges. Instead of the filler block
noted on the plan, use a piece of 2" x 6" plank (detail
drawing of this option is included). Let the bottom and bow
transom plywood butt at this joint and glue and fasten the hull
bottom and bow transom using 1" nails. Fasten the ends
of the plank to the chine logs, plank ends flush with the outside
of the sides. Round off to suit and apply Fiberglass tape and
resin. Fasten the bow transom top (a 3/4" x 4-1/4",
3', 11-1/2" board) to the bow transom using glue and 1"
nails.
Mark the outside bottom for the locations of
the skids. Cut these from 2" x 4"s, six strips in
all, and glue them together in pairs as shown, using epoxy.
Form the curve either by securing each pair to the extreme outside
edge of the bottom before gluing, shoring in place to follow
its outline, or by constructing a jig for this curve and doing
all three at once. Let glue harden overnight and cut the fore
and aft taper the next day.
Bore pilot holes for skid fastenings through
the bottom, glue skids with epoxy, and fasten them from the
inside with 1-1/4" anchor nails, shifting to the 1"
nails in the tapered sections.
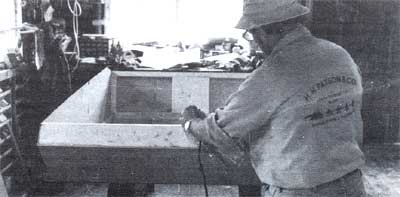
Turn lhe boat right side up. Install the inside
gunwales, sheer moldings, quarter knees, and seat frame. Pack
Styrofoam flotation under the seat. Install the 1- 1/2"
x 3-1/2" backing block for bow eye.
The only change I made in the original plans,
with Phil's approval, was in the bow joint, which catches the
lower edge of the bottom as described in the option noted above.
This is simpler and faster and it makes for better nailing than
using the 3/4" x 5-1 /2" framing as originally drawn
and adding a filler piece.
There are no bugs in building Skimmer. The hardest
part is getting the correct bend in the skids and holding it.
I bent and glued two pieces of 1-1/2" x 3/4" spruce
together and clamped them to the outside edge of the bottom
to conform to that shape until the glue dried, one set of skids
to each side. I clamped the third set to a jig, taken off the
shape of Skimmer's bottom. The next day I tapered their forward
ends and fastened them on, nailing from inside while a helper
backed the skids up with a heavy maul from the outside.

Click image to enlarge
Skimmer is a very stable platform, stable enough
to stand up and fish from. 10 hp to 15 hp is just right for
Skimmer. Don't put on any more unless you want to scare yourself
half to death.
Plans are $30 a set, from H.H.
Payson, 31 Pleasant Beach Rd, S. Thomaston ME 04858.