My lovely John Welsford designed “Twisted Seagull” lost a fight with the snowplough last winter that required two fairly massive hull patches. After these were patched up I got in some early rowing in training for my 25 miler I had coming for the Cancer Society fundraiser. On it’s second outing this spring, while levering her up onto the dock, I jammed a dock cleat through her starboard side. This was at a press photo op with the Mayor of the City of Kingston to promote the upcoming Row for Cancer Research.
Poor “Twisted Seagull” was having a tough year.
(click the images for larger views)
|
 |
|
Sue aka “Captain Crunch” and Amanda had also added a few scrapes and dings as we rowed about in the 1000 Islands in early spring training. She ran aground 3 times, which is why she armour plates her boats with three layers of fibreglass. For lightweight, I had only fibreglasses Twisted Seagull’s seams, trusting in my superior knowledge of where all the rocks are, yeah right! If I know where any are, it’s because I previously “discovered” them myself using the Sue Davis method too!
|
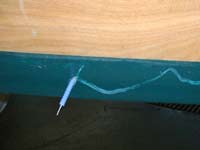
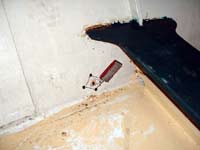
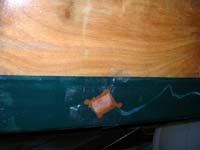
Here’s the small hole and gouge the cleat made. The pen’s just to show the hole against the dark background. Nice scratch too. |
|
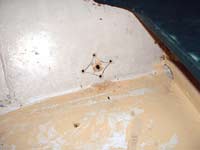
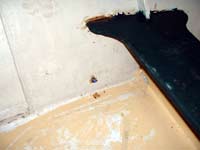
Here it is from the interior. Doesn’t look like too big a deal. Unseen in the photo are two diagonal cracks through the plywood. To stop the cracks from ever growing in the future, I drilled a hole past the furthest extent of the cracks. This is common practice in the aircraft trade to stop fuselage cracks from growing, and I thought it made sense here also.
I half drilled from each side, to obtain a bevelled surface for the epoxy to get a better grip on.
|
 |
|
|
The holes would be filled with thickened epoxy of course, making a repair that should end up stronger than the original 5 ply marine plywood. |
|
Then the holed and cracked area was cut out with my trusty Swiss Army knife, this is an official free plug for Victorinox knives, the boater‘s best friend!
Then I held a scrap of plywood up to the hole and traced the outline onto it.
|
 |
|
|
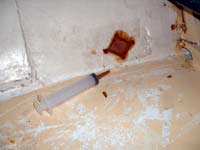
This was then cut out and roughly bevelled to form a “V” to be filled with the epoxy thickened with wood flour. I first brushed un-thickened epoxy into the V and on the patch. Then filled the V and the drilled holes with epoxy thickened to a peanut butter consistency. I filled a large irrigation syringe and used it like a caulking gun to squeeze the goop into the groove. These are available from medical supply stores, also a good source of low cost nitrile gloves for epoxy work.
This was repeated from the outside.
|
|
The tape, of course, held the patch in place and helped ensure that it would cure to a nice smooth finish.
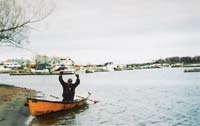
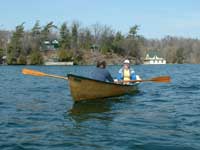
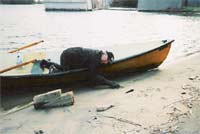
Later the paint was touched up and Twisted Seagull made her 24 mile Cancer Row in 9 hours.
|
 |
|
|
These last two photos are at the end of that row. One for the press release.... |
|
|
.....the other shows the reality. |
 |
|
|