Electrolysis Revenge
“Electrolysis”. For a boat owner of any type or boat builder this little word strikes terror in our hearts and souls. Some of us would rather hear “Divorce” or “IRS” than “Electrolysis” because it brings visions of our bottom bolts that hold the lead ballast breaking and sinking tons of lead to the bottom of the ocean in an instant. Or a cylinder in our $10,000 Diesel engine having an “Electrolysis” eat a giant hole in the cylinder wall and breaking the crankshaft when the piston comes up against a solid wall of water stopping just it and not the remaining parts of the engine in motion. The inertia nut cracker effect is what I call it. All of these fears spawned by one word that eats at our thoughts as well as our boats while they sit comfortably in water.
It is an Evil generated by the machine age that makes different metals exposed to electric fields eat away at the weakest metal or all of them if the electric current is not grounded right. How many of you know that you can make a battery out of sea water and aluminum foil that operates on the basics of ”Electrolysis”. The water in the ocean if used correctly has the capability of running all of modern mans electric needs, a man named Tesla proved that theory and many others that are hidden away in the vaults of energy companies. “Electrolysis” is still an enigma wrapped in a ugly cloak and the most misunderstood thing aboard our boats.
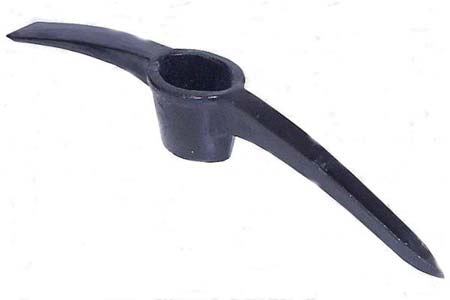
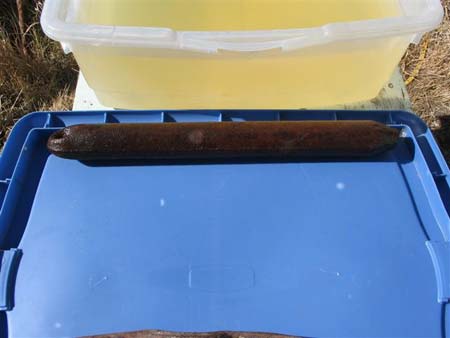
This is the picture of the pickhead after I Painted it and used rosin core solder to fill in the deep pits that were eaten away by rusting. I did not get a picture with the new pick handle made from fiberglass that will not break or be affected like wood from UV or aging. The solder I only used if the structual integrity of the item is preserved. I would not fill in anything too weak to be used properly. The solder sticks better than bondo and will not fall off.
What if I told you that boat owners could actually tame the “ Electrolysis” monster and use it for purposes other than destruction and mayhem on our boats. How many of you have rusted tools that you are ready to throw away or boat parts that went out into the ocean and rusted terribly. What if I showed you how to clean rust from iron and steel using “Electrolysis” the bane of al working and pleasure boaters!
Now I have to tell you up front that a friend showed me this trick and he took it from a magazine article but I used his recipe to enlighten you. If he ever (my friend) finds the article I will give the credit to that writer . It is simple and most of you may have many things already that you need to make “Electrolysis” work for you to remove rust from. I did resource this through the internet and found many new things out about the method I am going to show you
First you must find that rusted tool or ferrous metal boat part that was insanely rusted by either salt or fresh water. It will clean all the rust off the tool or boat part but it will not fill back in the pits left from the rust just eating into the metal. It is a good thing that modern paints and plating techniques can help you turn that rusted junk into treasure again. A friend showed me with a pair of pliers that fell from his pocket into his back yard over a year before and he found them this spring with the lawn mower doing either of them no real good except finding the loose metal missile that could have killed some one in a nasty lawn mower accident.
You must also be warned that if you have hedge shears or anything with wood or plastic you must remove those parts and this process will lift paint from the item but if you have them galvanized for use if it is a boat part it will not matter and you can repaint the tool with rust inhibiting paint when the rust and some paint is removed.
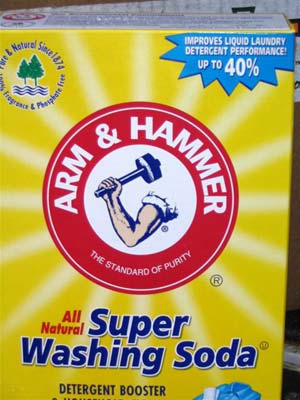
this is the Soda you must use for rust removal. I do not know about other brands, I know that Arm and hammer works well and has no other ingrediants to harm the project.
So you have stripped the rusted piece of junk down to just metal and frozen tight rusted bolts and washers. Now comes the easy part and it is fun so the whole family can watch the science experiment.
A List Of Items For The Transformation With “Electrolysis”
First you will need a tub made of rubber or plastic. It must be at least twice the size of what you want the rust off and have room for a sacrificial piece of steel. If your rusted junk is big you will need a big plastic pale or storage box that is leak proof. If it is small then just a small dish pan will work as long as all of the metal is submerged. That is important the solution must cover the rust part completely. I didn’t know this but many old rifles found on civil war battle fields have been made to look very nice after being rusted for a hundred years with this process. My friend told me he fixed his steel propeller mount and rudder with the same method and had them plated so they would last longer than just painting them this time when he puts them back on his boat. He did not need to buy new pieces of metal for his boat. He removed all the rust and had the items plated so they can withstand the very thing that almost ate them away.
You will need a small battery charger, this works just like chrome plating but in reverse. Then another small piece of steel like I said before that the rust will stick to once it leaves what you want de-rusted. The final component is a chemical that you actually need to where gloves with when you use it. It is just common Arm and Hammer all natural Washing Soda and you can find it in the grocery store in the laundry department with the soaps. Not Baking Soda but Washing Soda and there is a big difference. I will take a picture of it so you will not be confused.
Now The Good Part
You take your rusted object and put it in the water that you mixed one tablespoon of the washing soda to one gallon of water and distilled water will work better so you can buy some of that for about 70 cents a gallon. Then you put in the sacrificial steel and it should be close to the same size as the rusted piece. Now take the unplugged small battery charger and hook the negative cable to the rusted piece you want clean and hook the positive cable to the sacrificial steel piece. My friend had a charger with a meter on it so you can see it working when the needle moves. I have one with LED lights and it did not work so I used my very large battery charger with a meter, the new electronic battery chargers will not work because it signals the unit it is grounded out and not working. Turn the charger on the lowest setting and do not go any higher. Two amps is about perfect. I placed a dead battery on my big charger then hooked my battery jumper cables to the parts in the pan so it would only allow about two amps to run into the rust removing medium.
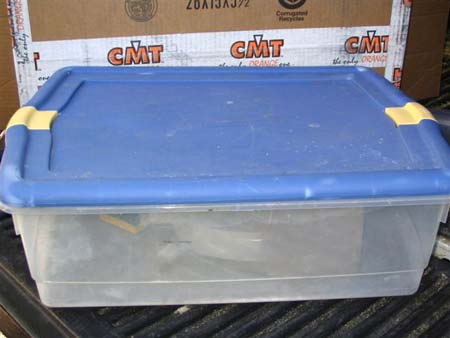
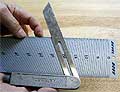
This is the large plastic container I usd to derust the pick head.
This is the part that is scary. You can watch the metal start to bubble and that is coming from the rusted part and it is pure Hydrogen gas. The bubbles coming from the other metal with the positive cable is pure oxygen gas. This means unless you are in an open area with a fan blowing on it you are not OK. Otherwise if you do it in a house after about an hour you cold blow the roof off the house and kill yourself. Well it might take three hours but you get the idea and that is why you do not under any circumstances use a higher setting on the charger or let the pieces touch each other under water and short out the charger. Hydrogen and pure Oxygen make the most powerful explosion next to Nitro Glycerin. Funny as it sounds once the energy is expelled all that remains from the explosion is pure H2O or water. So you take a lot of electricity to make the pure hydrogen and oxygen and then light them on fire and they give off and equal weight in pure water. If we made cars to run like that we could just take the water and put it back into the tank to make more power all that is missing is the electricity. So please do this outside in an open area and keep it away from devious kids ( We are the people, our parents warned us about! Jimmy Buffet). You must never stick your hands in the water with the charger on and you must where those thick rubber gloves after you have started because it changes the washing Soda into something that can eat your skin off your hands. So never stick your hands with gloves into the solution while the charger is on and never use bare hands after you start using the charger and it is off with the washing soda.
In about five to ten hours your rusted solid piece will be completely free of rust and watch the meter or lights on the charger to tell if the process is still working because after about an hour a thick rust film covers the entire top of the tub and you can not see the bubbles any more. In the end you can take the part out of the water and rinse it with pure hot water. The you can cover it with WD 40 to stop rust from forming again and my friend sticks his newly clean once rusted parts into an oven to rid the parts of all of the water. Then your newly cleaned item can be painted or plated with galvanization, chrome, copper, bronze and a hundred other plating processes that make rust proof coatings on the once useless boat part or tool you have had. The miracle of “Electrolysis” has done something nice for one time instead of trying to ruin your boat.
I told my wife and she yawned, then asked why I would not just buy another newer part instead of reusing a rusted piece of junk. But my answer was, as a boat builder/owner/writer and enthusiast I have found a way to tame the “Electrolysis” monster. This is a moment in history almost as significant as the outboard motor or the first surf boat. Finally we can use the nightmare monster for a good use not like atomic energy promised when it was discovered and still has not found a good completely safe use. Sure they have radiation treatment but your hair all falls out, wait “Electrolysis” makes your hair disappear also! Maybe that was why my wife was not impressed? Women always use the monster “Electrolysis” to remove hair, just when I thought this was special I remember that some women with thicker facial hair than I have, and they had their blue beards removed by the same monster that destroys our boats. This must actually be Irony. From what I have read on that subject it supposedly hurts like getting burned. Well enough visualizations of bearded women being tortured by mad hair removal experts!
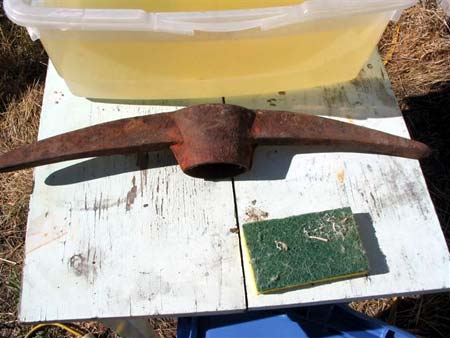
This is the pickhead before derusting filling in pits and casting numbers and sharpening points to original condition. It is probably about four ounce heavier here also because of the sharpening and huge amounts of rust still on it.
Things I have Found that work
Just like anything there is some experimentation. Do not us any non Ferrous metal because it will create more heat and since rusting of iron and steel is a different type of process than oxidation of copper or aluminum the compound will only destroy what you are trying to clean. Another thing to worry about is galvanized or platted metal. In chrome plating the shop uses a thin coat of copper on the steel before they add the chrome. Galvanization used cyanide and cyanide gas can be formed if you try to remove rust from a galvanized piece of metal, remember what I said about a very airy place to do the work in the first place. The cyanide gas kills almost instantly in very small doses.
When you put your sacrificial metal into the vat the side that the positive current( sacrificial side) gets the most action from piece you want the rust removed from. You can make a nice all around metal by placing a steel metal sheet around the whole plastic or rubber tub you are using. Just bend the thin steel sheet to fit the inside of the tub and the rust will be removed on all sides of the rusted piece. Please do not put the sacrificial piece under the object to have the rust removed from because the instance of a short circuit is entirely to great. Stainless steel works best for the sheet bt not pure stainless it ust have a little magnetic attraction and will last the longest. My experiments have yielded some surprising results.
This process also remove any paint on the part. Again I must say that unless it is in the first couple of minutes do not stick your bare fingers into the solution of washing soda that is actually sodium carbonate a strong product when used in the process. When you hear Sodium do not take out the plain salt shaker and use that as the cleaner rather than the washing Soda! Using table salt will quickly destroy the item you are removing rust from and you will end up with a pile of depleted hydrogenised metal and fumes that can also kill you from the chemical reaction. Those fume are 100% pure chlorine gas that when spilled near train tracks they clear a twenty mile circle to protect people from almost instant horrific death where you claw at your throat to try to get something to breath. I hope you people are not going to try and kill someone with this information, I cannot be held liable because I have informed you of the detrimental effects and have taken out key items that would help you commit a murder with the review and I have warned you of the negative results in using some different types of material for your safety only. If you have a big enough vat but it is metal you can buy big rubber liners or heavy plastic to line those tubs and you can put very large items in for rust removal. I have heard that some people will actually remove the body of a car and all the attachments and remove the rust with this same process. They must use bondo to fill in the pits that rust leave behind but it does the job for car restorers.
Here is the sacrificial metal used to remove the rust. It is just an ld window weight. I have a hundred of these weights that came from the old hotel torn down a few blocks from my house. I use them for float weights when I used to practice sailing racing.
I was once delivering some packages to a frozen food plant for their machinery and I could not pull into their dock so they unloaded my truck van on the street with a pallet jack and a Hispanic helper to get the pallets onto their forklift. One moment I was clawing for air because I could not breath and the next I was waking up in the hospital. One of the main ammonia lines had ruptured near my truck the helper, the forklift driver plus myself had passed out completely. Along with about thirty other workers nearby. This was in Sanger California near the Sanger boat company that is just a few blocks away. I had to stay in that hospital for two days not knowing what happened to my truck and if anyone had left a message for my wife.
It was a company hospital and there were only a couple of people who spoke English. I did not even know it was the company infirmary until I left. They were really worried I would sue them I guess. The point I am trying to make is do not do something stupid like trying this in your apartment or in a closed closet in a house where people smoke. A closet sized space of Hydrogen and Oxygen could level your entire house. Using salt could kill your entire family from chlorine fumes or using galvanized steel could kill you just by breathing a tiny amount of the gas. Now that you are done using the mixture pour it into empty plastic milk cartons and spread it on you mother in-laws lawn, oops I meant take it to the dump and tell them it is caustic waste and they will charge you about a dollar for two gallons. You could put it in your toilet if you are not on a septic system. Please do not take this article to the coast guard and tell them I told you to dump the liquid in the toilet, I am just joking. If you have a septic system do not do it because it will kill the good bacteria in your septic tank and it will have to be pumped out. I put my solution onto a large pan like they once sold in aoto supply store to place under a car that drips oil onto a driveway. I placed it in the sun and let the liquid evaporate and I was left with powder. I took a magnet and separated the magnetic particles of rust out then reused the powder on another rusted object. Yes it can be recycled.
The Best Part
It is time to remove the parts from their bath. Use glove and take the parts out and hose them off with clean water and you can use a scrubby sponge ( one side has sharp plastic scrub pads and the other side is just a sponge) to remove anything that might be partialy stuck to the surface. You can see how clean the parts look after the scrubbing and washing. If you are going to paint them do not use WD-40 because it has some silicon in it and the paint will lift in a short time. Put it in an oven or heat it with your acetylene torch to remove the water then paint it as soon as possible. Some gun collectors actually use lead to fill in the small pits in the surface that rust leaves. Just in case you did not know, before the use of epoxy products like bondo all body shops used lead to fix dented cars that were in accidents. The old guns can be blued or browned and look real good until you look at the barrel. I think for a boat you should have the parts powder coated. Where they take paint in powder form and heat it ina spray with electricity until it actually melts against the metal surface to form an incredible bond that resists scratches and rust or have it plated. The least best plating is chrome because they plate the steel or iron with copper before they use the chrome plating and the copper is eaten first. Even on autos with chrome plating, rust will start where the dirty “Electrolysis” eats away the copper under the chrome then the rust takes over and the chrome falls off. Galvanizing is one of the best platings you can use but if you are going to use it as a plate to attaches a hook to try and get the hook or pulley or any fitting that hooks on plastic or Teflon coated so it does not wear away the galvanization very fast. Galvanized fittings last longer if they do not have metal to metal contact. Even a little UHMW can keep the wear away from those platted parts so they will not rust away again.
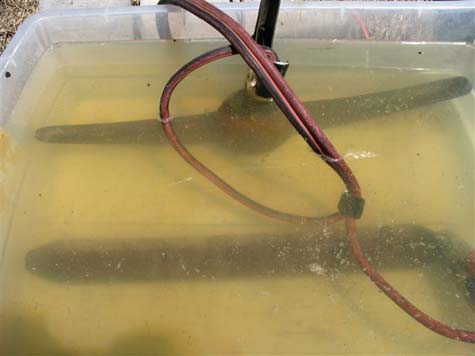
Here is the actual process but I am using old jumper cables now. I did this because the process will eat away the good ends of the battery charger. So if you can find old jumper cables they will work better for placing into the solution. You can just start to see the tiny bubbles form from the process. I did this out in back of my shop where it was windy to carry away any fumes. I would recomend never to do this inside a room or shop with any electric tools running. Just one spark with any concentration of the gasses could cause a serious explosion.
The bad part I was not going to tell you about
I used my big charger and I could not get it to charge slow enough. I went all over town looking for an old style trickle charger but all that was available were the new electronic ones with led lights and not a gauge. The easiest way to tell if the charger will work is if it has a gauge. When the pick head I removed the rust from was done it looked like a dull grey or pewter color. To fix that you need to bake the part in the oven at 400 degrees for about an hour. It is hydrogen that formed on the surface of the metal and that is the way to remove that dull color before painting or the paint will not stick and rust will form again. Do not take the part out of the oven and run it under water or dump it into water. That removes the temper of the metal and at that low of a temperature could make the metal slightly brittle. Just let the metal cool in dry sand or open air and it will turn shiny again. Craftsman (SEARS) just came out with a home powder coating gun. I am trying to get one for testing but this would be the best way to cover your new metal parts after removing the rust. Now I am not talking here about slightly rusted parts that naval jelly or some of the other new rust remover can work on. This is the rust that might be a half inch thick in a three inch thick piece of metal we are talking about in this article. Please be careful and this can be a very useful tool when repairing or finding parts to build a boat with. All kidding aside if you use this process safely you can make old part look almost new again.
From my Tool Crib sort of scratching my head (after removing my gloves).
John
# # #
|