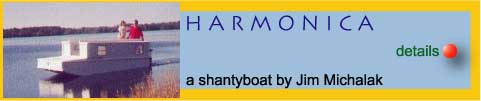
| A Micro-Shanty
Style Houseboat as built by Bill Nolen
Part
1 - Part
2 - Part
3 - Part 4 - Part
5 - Part
6 - Part 7
After waiting several days for the epoxy that I had
applied to the hull's bottom to cure, I selected six
1" by 4" by 8' boards to be used for the
hull's protective skid's and bottom stiffener's. These
boards are bent over the bow of the hull, and are
attached with screws and epoxy. At first I was going
to attach all three skids at the same time, but decided
that it might go more smoothly if I did one board
at a time, allowing the epoxy to cure before going
to the next board.
I measured and drew a line down the center of the
boat. Using this line as a guide, and one of the skid
boards, I marked the area where epoxy should be applied.
After I mixed and applied thickened epoxy, the center
skid board was placed onto the epoxy. A 2" by
2" board was secured by clamps at each side of
the hull to apply pressure to the center skid at the
bow end. Two SS screws were driven in to hold the
skid board onto the bow bulkhead. The center and aft
end of the skid was bent and secured into place with
wooden boards, clamps, and SS screws.
As you can see in the follow photos, quite a bit
of pressure was applied to hold the bow end of the
center skid board, bending the 2" by 2"
clamping board.
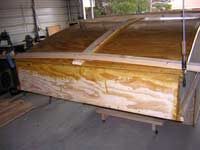 |
The bow end of hull, showing the
center skid being held in position with SS screws
and clamps, both at the bow and also in the center
of the hull. |
I then attached the aft end of the center skid in
the same manner as I did the bow end of the center
skid. To mate the two skid boards together I had cut
a 45-degrees edge to the meeting edges of the two
skid boards.
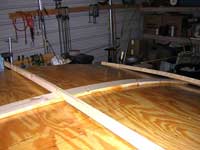 |
The center skid
attached to the bottom of the hull waiting for
the epoxy to cure. |
Repeating the same procedure, I attached the two
outer skid boards. In the following photo you can
see the two aft ends of the outside skids being held
in place with a wooden board and clamps.
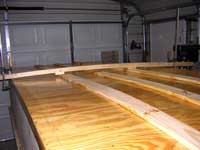 |
The three skids. |
My next step was to sand the skids and epoxy coated
plywood bottom to ready the surface for the primer
coat of paint.
In the following two photos I am using an orbiting
sander, with 50-grit sandpaper, to sand the epoxy
coating on the hull's bottom.
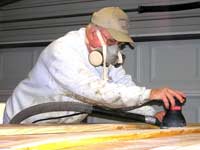 |
Me sanding the
aft end of the hull's bottom. |
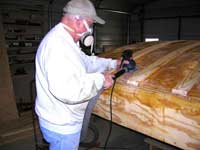 |
Me sanding at
the bow of the boat's bottom. |
Although I had my shop vacuum attached to the orbiting
sander there was still a lot of epoxy dust in the
air. As you can see in the above photos I was wearing
a respiratory face filter, and most of the time I
also wore eye goggles. Hey, I wanted my beautiful
blue eyes to show in the photos!
To aid in removing the dust from the boat's bottom
prior to painting, I moved the boat outdoors where
the wind was blowing quite strongly. I also used a
hand brush, and the shop vacuum to clean the dust
from the hull. To rid the hull of the very last of
the dust I used a damp towel to wipe the bottom clean.
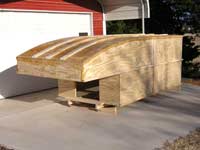 |
Here is the
boat outside |
I would have used a tack cloth to wipe the hull down,
but was afraid that the tack cloth might leave traces
of wax or shellac on the surface of the epoxy.
Previously, I had decided that I would paint the
Harmonica with a latex based paint and had purchased
a gallon of KITZ Premium Water-Based Sealer-Primer.
Using a roller brush I applied two coats of KITZ
to the bottom of the hull, allowing the first coat
to dry before applying the second coat.
 |
Primer Coat |
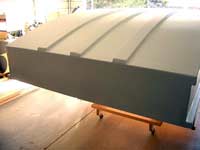
After the two prime coats had dried I applied the
first coat of Bright Red Acrylic Floor and Deck Paint.
 |
The first coat
of red paint. |
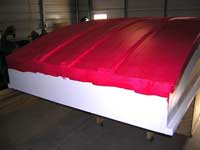
After the first coat of red paint had dried, I added
two more coats of paint. I then waited for one full
week for the red paint to cure.
Finally it was time to turn the boat right side-up!
I made arrangements with four men working at a cemetery
just down the road from my house. They agreed to come
down and help me flip the boat. Prior to their arrival
I moved the boat out of my little barn, and placed
three old auto tires and a tarp on the concrete apron.
I was hoping that this would lessen the damage done
to the paint.
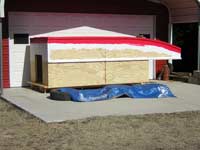 |
The boat ready
to flip. |
I have no photos of the actual turning over of the
boat because someone (me) failed to let the photographer
(my dear wife) know that the men had arrived! It only
took the men about 5-minutes to lay the boat on it's
side and then on the bottom, and lift the boat bottom
side down onto the dolly…and depart! As you
can see in the following photo I'm still in a state
of shock…wondering where everyone went!
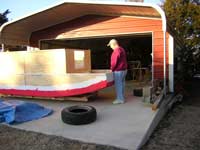 |
The boat right
side up. |
GO ON TO PART FIVE |