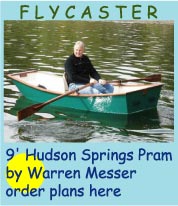
Design by Warren Messer - Seattle, Washington - USA
After launch day for the O&P-Pod (Owl & Pussy Cat) at my nearby lake, I had to stop at the library on the way home and pick up a book with the poem by Edward Lear, since it's been a few years (decades) since I last read it. ;)
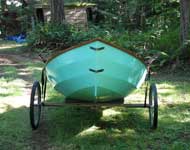
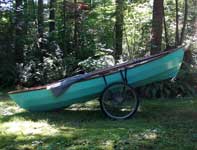
"The Owl and the Pussycat went to sea in a beautiful pea-green boat." It was actually Lake Wilderness, which is a short walk/pull from my home. But this time I had my new boat cart built with the 26" tires stolen off my old garden way cart (probably around 30 years old now). I can't believe how easy it was to pull the boat along on those big wheels (good for 300lbs each), and it became more apparent when I was going down any slight grade. It was pushing me along, and I wished I had brakes on it. I will post a story here soon on how I built the carrier; the company to order them from, and the item #'s of the wheels in their online catalog. They are only $35 each, plus shipping.
"They took some honey, and plenty of money, Wrapped up in a five-pound note." I just had my camera, oars, cell phone, some water, and a turkey pastrami sandwich ( but not made from the turkey that married them). Once I removed the hold down straps from the boat, I rolled the cart into the water and let her slide down the ways. I let her bob in the water a bit, as I put the cart aside and got my camera out. I believe the Owl sings it best.
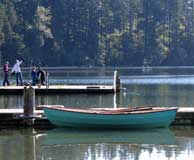
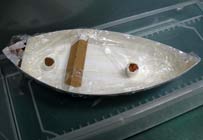
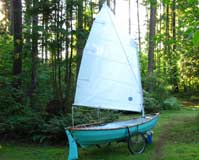
"The Owl looked up to the stars above, and sang to a small guitar, O lovely Pussy! O Pussy, my love, What a beautiful Pussy you are, You are, You are, What a beautiful Pussy you are". I was very happy to, but my song was internal. After two years of design and modeling (50+), I had what I wanted. She sat exactly on her unweighted waterline, with no droop at either the bow or stern, just like the model did in my tank testing. I took a few photos and walked her over to the dock, so I could take her out for a quick spin.
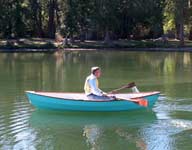
A man fishing on the dock was all smiles when he saw the O&P Pod sitting in the water, and then two teenage girls came over to check her out and ask me about the boat. Everybody thought it was a fiberglass hull by the finish, and were much surprised to find out it was made from plywood. Who said a plywood boat built in the stitch and glue method, can be easy to build and stylish too; and not look like a shipping container. Oh, me.
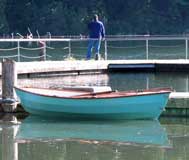
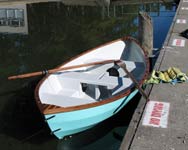
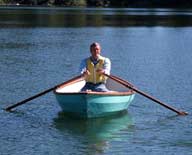
My friends hadn't arrived for the "one and two up" photo shoot, so I took the O&P out for a spin. This is one easy to row hull. I have to say this is the best rowing hull of mine so far, and tracks like an arrow. I added a bit of a skeg to the end of the keel seam mainly for looks, but it was like putting feathers on the end of the shaft. It also acts as a brake when doing spins by counter rowing. Once you stop counter rowing, the hull rotates another three feet and stops. So I started down the lake and was surprised to notice after a few minutes that I was already approaching the shore at the other end. I did two full circumnavigation's of the lake and went back to the dock to wait for my friends.
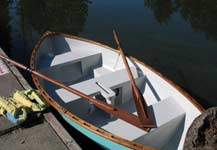
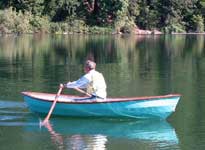
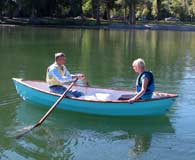
I sent Nick out by himself first to get some photos of the balance of the hull with one person, and saw that the boat sat level in the water, and where my scale weight indicated the single person rowing position should be. It took a while to get him to come back so Edie could go out with him.
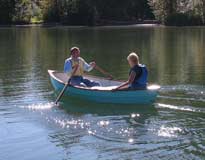
On this boat, and my next boat, the 12ft Granville Bay, the "two up" rowing position is at the forward seat. The Granville Bay and the O&P, both have reduced volumes in the ends, so the people weight has to be spread out over the hull. More so than my Pram designs, which have a lot of volume in the stern areas. After Nick moved the oars to the forward position, I helped Edie get into the boat, and off they went.
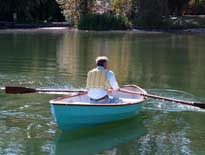
Again, I was delighted to see that the O&P still balanced to her waterline indicated from the double weight tank tests. For a "three up", the rower would stay in the forward seat, and the third person would set in the middle, over the daggerboard opening.. I was also amazed at how well the hull coasted when Nick stopped rowing. On his last inbound trip, the hull coasted over a hundred feet, and was still going strong when he dipped the oars in the water and stopped. He also said it was just as easy to row with two as it was for just him. He's asked me a couple times now how much I'm going to sell her for. I think he likes her.
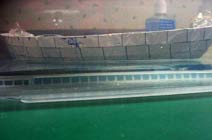
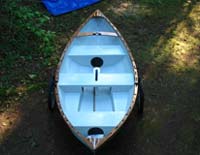
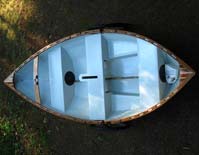
I was trying to figure out how to show the shape of the hull with a top view; when I remembered my barn has a loft where I used to store 5 tons of hay for the horses (worse money pit than having a 40ft boat). Now you can see what I am talking about.
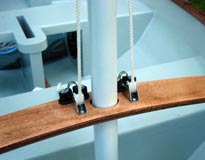
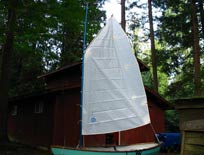
I rigged up my Neil Pryde Pram 64 sail on the hull to check for placement of the boat side of the sailing hardware. At first I was going to use an "end boom" setup, but switched over to a "center boom" main sheet system. The 1 1/2" by .065 wall, tubing I used for the boom, is more that stiff enough to handle the loads, and I only need to install a stainless "eye strap" aft of the daggerboard opening on the hull. I will have to steal the one off the 8ft Nuthatch, until I can order another one from Sandra.. This first setup was with the Pram 64 in the "Sprit sail" mode, and you can see how it fly's in the photo.
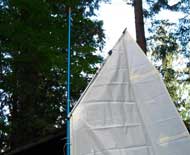
I had been thinking about using the sail as a "Gaffer", after talking with Bob Patterson at Neil Pryde Sails. With the head at a steeper angle than most sprit sails, this was a possibility. I had an old aluminum sailboard mast that I put a slight kink in, while sailing down in the Columbia Gorge, and got flipped end over end. I only have to get some boom hardware for it, and it's off to the lake. I actually like the looks of the sail with the gaff rig, and it's a lot easier to get the sail up and down while in the boat. I don't have to worry about the snotter block being in the way to catch on each of the luff ties, as I host the sail. I can rig at the dock, and set sail away. I have an idea of how to make the "gaff shoe", and will do a story when the details, and parts used, are fleshed out.
The final rigging system will also show up in one of my upcoming www.youtube.com/redbarnboats videos, so bookmark this link. I still have my O&P www.flickr.com/photos/onp-pod site, but I don't have all the photo phases of the construction process as I did before I switched over mainly to video. I've been working on the O&P plan set off and on (80% complete), but haven't gotten really worked up about it. I will try to get the "Instant download" study plans finished first. It's not a hard boat to build, but more so than a box. Pester Chuck to pester me into finishing the plans, if the O&P Pod is the boat that floats your dreams.
Chuck also asked me when I sent him some early photos of the O&P's launch day, if I had a longer design. Yes, I have a 17ft O&P RAID design finished, but not built yet. I have the basic lines and panel measurements worked out, but not the interior parts..
My next hull up will most likely be the 12ft Granville Bay, and I will be YouTubing it from the very start. So if you are curious about how I go about laying out and building a prototype hull from scratch, and want to catch up on the hull construction phases that I skipped over (didn't know earlier that my digital camera took such good videos) when building this hull, please bookmark my YouTube link.
"and hand in hand, on the edge of the sand, They danced by the light of the moon, The moon, The moon, They danced by the light of the moon"
Warren Messer
Red Barn Boats
Stitch and Glue and Stylish Too