You've read plenty of my stories on the actual construction of a boat, but I haven't yet written about how I use the information gleaned from the tank testing of my models. As you know, I don't go into a whole lot of calculations on how wide it is to how long it is, or any other mystical voodoo that is needed for large displacement hulls. It's a small boat, and it either looks right for it's size, or it doesn't. They shouldn't be difficult to balance arrows or wallowing boxes; and I would like to think that my designs would bring a smile to the old timers of the past.
The O&P Pod is the first double ender I have built; and is the result of model, after endless model. I have nested stacks of model cardboard hulls that would make great French fry containers for a busy fast food restaurant. Sitting on my work platform in the shop, the hull looks a bit full. But when I check the total hull depth from gunnel to keel, its not that bad; and when I put the end of my tape measure to the floor and look at the depth that way, it seems to be correct. My 10ft Nuthatch looked big that way too, but in the water not so much.
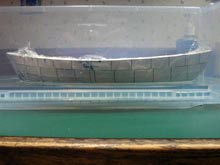
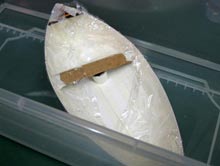
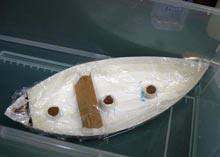
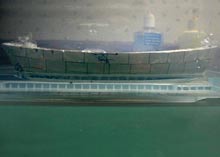
I took the last model that was hanging above my kitchen counter, and stretched a layer of "Saran Wrap®" over the hull. I added some tape around the edges on the inside, to keep it tight against the hull for the test. Then it was time to fill the tank with enough water to float the hull, and high enough to see under it. I have three "super size me" scale people that I use to weight the hull down with. Better to have some one tell me the hull floats higher than they expected, than the other way.
 |
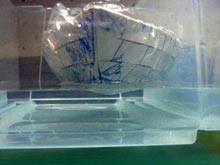 |
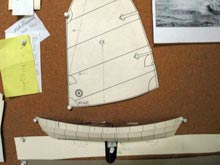
I start off with the hull floating empty to see where my "non-designed" waterline is. I will use this information when I tack a half-hull to my cork board for the CLR/CE tests. I use the empty hull waterline to mark and cut out the wetted surface hull area silhouette, which is later balanced on the point of a needle. The CLR point of the balanced silhouette w/daggerboard; also determines partly where the center (solo rower) seat is to be located most of the time. After doing the tank tests with this double ender model, things are somewhat different, but not out of line. The balanced empty hull, and the balanced hull with one person on board, were off by about eight inches. You will see what I mean when I start installing the interior components in this hull. The aft end of the center seat will be even from side to side, and the daggerboard projection will be on the forward facing side. This hull will have my solid flotation/storage chamber seating that I also used in the Pud-g and 10ft Nuthatch. It makes for a stronger and safer hull. For added safety, I will probably add a step handle near the stern too.
 |
 |
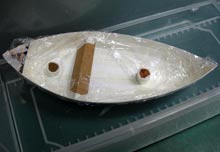
Once I had the location of and photos taken of a solo boater, it was time to take a friend along. This second scale person is a bit lighter than the solo rower, but not by much. I knew I had to move the rower forward to counter the added weight of the passenger; and that's when things turned interesting. It took a few moves of the scale people fore and aft, to get the boat into balance. To keep the rower out of the bow, the passenger has to move forward enough that the rower can be seated in a reasonable position. This is needed to keep the mass of weight out of the two ends; which would make a very tippy hull if left that way.
 |
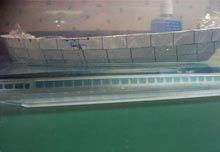 |
A twelve foot hull should be able to carry three adults comfortably and safely. Things became interesting again when I added the third scale person. There's not a lot of volume in the ends of a double ender, and a seat at the very end of the bow won't work. Once I had the hull re-balanced for three, the seat placement for two was off. This made it necessary to establish new balanced locations for two, and then back to three, and a recheck on one. By compromising the solo seat/daggerboard (and the mast step and mast partner) position a bit, I was able to get the three seats located. The positions were established using the model's upper panel "station" location marks that are cut into the prototype hull as part of the lofting process. They are finalized when I do the scale "plan & profile" drawings for the build set.
 |
 |
On this hull the forward rowing station is farther forward than on my other designs. More like a tradition hull, with the weight spread between the two tapering ends. Since this hull is asymmetrical, I had more volume in the stern to carry the weight distribution better. To add some leg room for the rower when in the forward rowing position, I will probably narrow the overall fore and aft width of the center seat, and have a thinner (side to side) daggerboard trunk. I've also been toying with the idea of having the stern seat shaped like a big "U"; that may join up with the center seat along the hull sides. That way I can build in a seat to use when sailing and not be wearing a hole in my tail bone when sitting on the cold, and sometimes wet bottom.
This hull will have "spaced rail" gunnel's, and I'm going to try something different when making the breast hooks. I have my flickr.com site up and running, and I am dabbling in the YouTube world too. I will maintain my quality level at the flickr site, but the YouTube thing is still having the edges smoothed out. Should be good for a laugh though.
https://www.flickr.com/photos/OnP-Pod
https://www.YouTube.com/user/redbarnboats
Thanks again
Warren Messer
Red Barn Boats. |