I now can't quite remember where
the idea to try my hand at boat building came from... but it
went something like this...
I'm a Scout Leader, which is fun and exhausting in equal doses
and am consequently always on the lookout for activities to
keep our Troop busy and engaged. One evening when discussing
what to do next with my fellow leaders (over a bottle of red
:-) the idea of ‘water’ as a theme was proposed,
‘we could go swimming’ one said, ‘hike along
the beach-front’ said another and something possessed
me to add, ‘we could build some boats and row out to Spring
Island and camp there’... sceptical silence around the
table.
After more injections of red wine, I decided that yes, we could
do this, and vowed to look around for plans for a boat that
would be easy to build, would go together quickly so the kids
wouldn’t loose interest and would be cheap enough to make
the whole project feasible. My fellow Scout leaders patted me
on the head, said ‘off you go then’ and smirked
(just a little) to themselves.
So armed with web browser and many hours of research (and much
procrastination) later, I hit on Herb McLeod’s “One
Sheet Skiff”. It appeared to fulfil all of
my major criteria, the plans were freely available and the results
looked like a real boat (confirmed by checking with a few passing
Scouts).
I do a little wood-work so have a reasonable selection of tools
already, however space was at a premium. I have a small shed,
but even the tiny One Sheet Skiff wouldn’t fit inside,
so she would have to be built in the back yard.
A visit to the local hardware shop provided a sheet of 9mm
construction ply (definitely NOT marine grade), a few lengths
of pine, meranti and a bottle of water-proof Polyurethane glue.
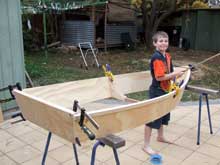
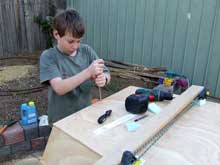
Youngest son Evan (9) was keen to help so we set up a couple
of saw-horses and prepared to make saw dust. [pic 1]
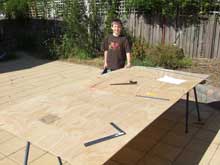
Pic 1 |
Pic 2
|
I wish now that I’d taken more photo’s during the
construction, but she went together so quickly and I was so
excited to see a real boat appearing from the dust... anyway,
you get my drift. It was only two afternoons work later that
the hull was pretty much ready to be glued together. The sheet
of ply I’d come home with had a slight warp, which I told
myself was an advantage. I kept the warp in mind as I cut the
sides from the sheet and fitted the pine rubbing strips. The
warped sides now started looking like a boat before we’d
done much at all!
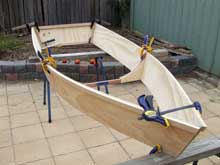
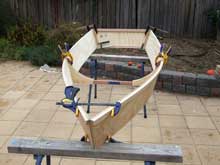
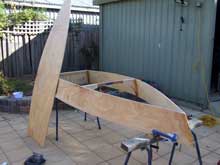
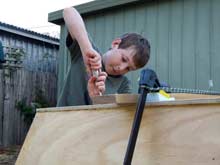
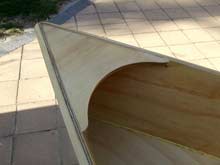
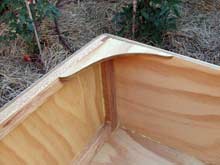
The most exciting time of the build was when we dry fitted
major components. We grabbed the saw-horses, clamped the sides
to the transom, the mid-ships rib to the sides then slowly drew
the bow together... it was pure magic... from some essentially
(mostly) flat, straight bits of ply a most charming three dimensional
shape appeared. [pic 2, 3, 4] She curved in all the right places
and just looked ‘right’ (‘fair’). We
must have spent an hour or two walking around in the evening
light looking at her from every angle and being absurdly pleased
with ourselves :-)
Pic 3 |
Pic 4
|
We departed from the original One Sheet Skiff plans in a few
places, deciding not to use chine logs, but rather to simply
glue the bottom directly to the sides with a few screws around
the transom [pic 6, 7]. I finished off by going over the outside
seam with 50mm glass-tape. After discovering the wonderful and
helpful Duckworks site and some others (almost as good :-) I
now know that I should have used Epoxy Resin for this step,
but in my naivety I used Polyester Resin... it appears to be
pretty strong, we’ll see how long it lasts I guess.
The Polyurethane glue went on well, expanding a little as it
dried and I’ve no doubt now that it will be quite strong
enough for this purpose. I did however learn a lesson in the
process. Wipe up glue spills while it’s still damp, Doh!
Don’t wait until it’s dry! Oh well, this first experiment
was supposed to be a quick ‘proof of concept’, I’ll
do better next time...
Pic 5 |
Pic 6
|
By now, the little boat was getting pretty close to being
lake-worthy, but we needed a set of oars! Hunting around I found
they were readily available from marine shops, but no, I was
‘into’ the project now, I didn’t want to buy
anything I could make myself in the backyard in an afternoon
(or so I thought)...
A trip to the local timber recycling place (Thor’s Hammer
in Canberra) located a 50-mm by 150-mm plank (2 * 6”)
of seasoned Hoop Pine which was lovely and soft to work. I ripped
it into three 50-mm square strips, cut the middle length into
four sections and glued these, one to a side, to each centre
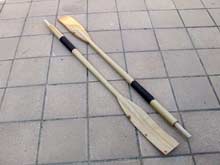
strip to form the blades. A lot of planning, spoke-shaving,
band-sawing, carving and a fair bit of sweating and swearing
later, a pair of oars emerged!
Pic 7 |
Pic 8
|
Now, a confession. Making the oars took probably 3 times as
long as the rest of the boat in total! Very satisfying, but
not the fastest way to get on the water. Next time I’ll
spend the $50... :-) [pic 8]
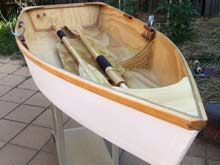
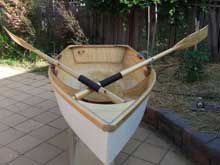
Early on, Evan and I decided to varnish the insides and paint
the exterior, so we made sure the clean(er) face of the ply
was ‘inside’ during construction. We put three coats
of varnish on the inside and the pine rubbing strip and finished
off with three coats of house-hold enamel white on the outside.
We still haven’t decided what to call her yet, so the
transom is just plain white. [pic 9, 10, 11]
Pic 9 |
Pic 10
|
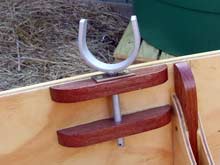
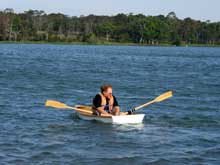
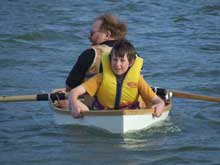
Now oars need oarlocks apparently, which we picked up from
the local marine store. I hunted around for a formula to tell
me where to put the oarlocks and after much fruitless searching
decided that they should go ‘around about’ where
my chest would be. [pic 12]
‘Buzzz... Wrong Answer. Thanks for playing!’ :-(
I now realise that they should be approximately the length of
my fore-arm away from my chest, to put me in a more comfortable
rowing position. Well it was too late now, the oarlocks were
in position and I wasn’t going to move them...
Pic 11 |
Pic 12
|
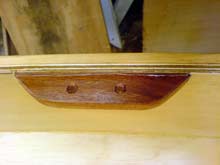
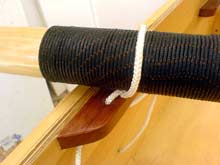
Then one evening I had a thought... I’m a Scout leader,
I’m not scared of knots and rope... Why not simply tie
a loop of stout cord to the gunwales and thread the oars through
that? Enthused by this quick way out of a bind, I quickly drilled
a couple of holes through two bits of scrap, glued and screwed
them where the oarlocks should have gone originally [pic 13,
14] and Bob’s your Uncle’... job done!
Older and wiser heads are probably shaking all around the globe
by now, but I enjoy experimenting, if it doesn’t work
we aren’t out of pocket much :-)
Pic 13 |
Pic 14
|
So there she is... a delightful little project that has got
me thirsting for more. Evan and I have already decided that
the next boat will be a ‘Summer
Breeze’ which we found right here on Duckworks.
We’ll modify her of course (Why leave something that works
alone? :-) and no doubt make mistakes, learn lessons and have
a whale of a time doing it :-) [pic 15, 16]
Pic 15 |
Pic 16
|
Pic 17 |