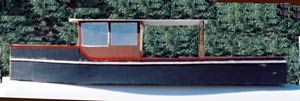
Those of you familiar with these pages may remember the building of the Sneakeasy "KATIE". I built her in 2002 and sold her in 2004. I was able to buy her back in 2007, but she wasn't the same! The other owner had allowed fresh water to stay in her for extended periods of time causing dry rot and water logged frames. I patched her up as best I could and used her for the 2007 season. She steadily leaked more and more until I felt it was not safe to take her out anymore.
I decided to salvage what I could and make another boat. I figured I could use the sides and some of the bottom and discard the rest. I cut her drake tails off at frame number 1 and cut about 2 feet aft of the stem(all rotten). I cut her in half lengthwise and began anew. I decided to name her "Phoenix" like the mythical bird of old which rose from the ashes and became new.
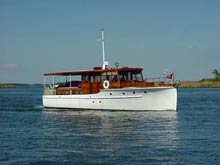 |
The inspiration for "Phoenix" |
I wanted to retain the "classic" styling of the Sneakeasy so I chose "Phoenix" to resemble a 1930's Elco Commuter. I did a rendering and then built a scale model.
| Rendering |
|
 |
Scale model |
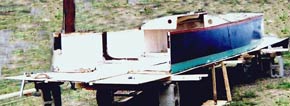
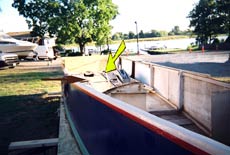
Once I was satisfied with the result I began to plan the transformation from a dismembered "Katie" to "Phoenix". I began by building a new bottom for the boat. I laid out 4X8 sheets of 3/8th plywood in a large rectangle. I put the sides of "Katie" onto the new bottom using roofing cement and screws. I used 3/8 inch ply because the original bottom of "Katie" was 3/8 inch. I left a 2 foot space between the sides making Phoenix 6 feet wide.
| Sides on the new "Katie" |
|
I then put the 2 foot 3/8 ply sections in the middle lengthwise to fill the space between the halves of the hull. The insert was set in roofing cement and screwed to the new bottom. This resulted in a 3/4 inch bottom.
Next came the need to rebuild the stern area lost in the surgery of "Katie". I installed a 3 foot section aft and put on a transom made up of 3 layers of 3/4 inch ply. I put an athwartships piece of 3/8 inch ply to match the other bottom section.
 |
The three foot section aft |
| Bottom extended |
|
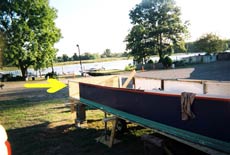
I then built the bow section following the curve of the hull forward, resulting in 1 foot more in length of the boat(28 feet).
 |
Bow addition |
In the picture of the bow (above) you can notice that I used external chine logs. It was the only way to attach the bottom using the old bottom and sides. I now had a complete hull. I put in the many screws to secure the new to the old. Much PL Premium glue was used in the process.
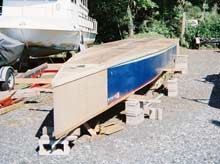
I flipped the boat over so I could work on the bottom. I screwed the new bottom to the old, including the new insert and stern and bow sections. I tried a new procedure for the chines. After rounding the edges I used fiberglass tape that is designed for drywall to cover the chine edge. I put 2 layers of the tape and spread PL Premium 400 like you would epoxy, filling in the weave of the tape. After it dried 3 days (less did not give time enough for a complete cure) I sanded and filled the area with surprisingly good results. I chose not to cover the bottom with glass, instead I coated the entire bottom with PL Premium which left a hard smooth coating. After sanding throughly I applied 2 coats of Behr Primer.
| Primer on |
|
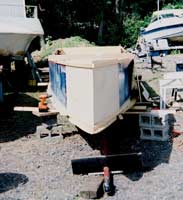
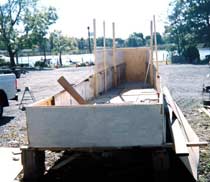
The next step was to turn her over and begin on the superstructure. Using the model I layed out the cabin dimensions. After I increased the hulI sides forward I installed the uprights, which will become the windshield, side windows and supports for the roof. I installed the forward bulkhead which forms the flotation chamber in the bow. I made it such that there is a Bolger anchor well in the bow, self draining. I framed in the deck between the anchor well and the windshield to accommodate a hatch. In the boatyard where I keep her are abandoned boats. The marina owner said I could take any items off a boat he was cutting up. I got a nice 2 foot square hatch and 2 smaller opening ports that I will use on the hull sides forward of the windshield.
 |
Turned over |
| Uprights installed |
|
 |
Rear view |
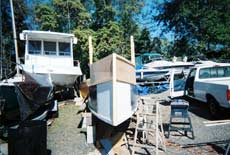
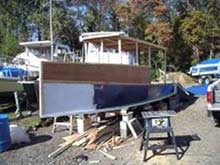
At this point I decided to strengthen the bottom even more. I put down 3/4 in. ply over the entire interior floor. As you might guess that stiffened her up substantially. This now gives her a 1-1/2 inch thick floor/bottom. It added extra weight but since she will not be fast anymore, I felt it was the right thing to do. I did install new oak floor frames at the windshield, at the aft of the cabin and forward of the transom at frame #1. I put on the roof rafters, installed the ply on the roof and framed in the bulkhead at the rear of the cabin, and installed a nice mahogany door a friend gave me.
| Cabin started |
|
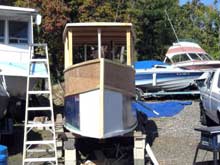 |
Front view |
| View aft |
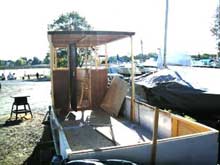
|
This concludes Part 1. The weather is getting cold here in South Jersey so progress, I'm sure, will slow to a creep.
My feelings so far are that Phoenix will be a stable, comfortable boat. I can't wait until spring when I can finish her and launch her.
Remember, you too can build a boat, sure you can!