In Part 1 we started a casting project, looked at equipment and made patterns and a mold. Now it’s time to melt some metal!
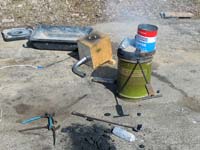
Fire tending
I like to start the fire with wood instead of resorting to lighter fluid. This is a good use for plane shavings and thin scrap. Try a touch of blast if you get a lot of smoke.
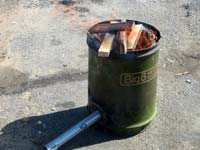
Then add the lid to keep the heat in and add charcoal a little at a time to keep the smoke down.
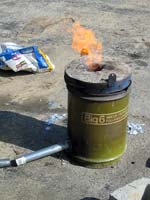
No matter what you burn, get the furnace preheated to blast temperature before adding the crucible. Otherwise you’re just putting wear on the crucible for no reason.
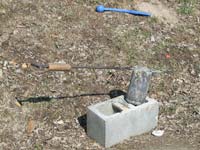
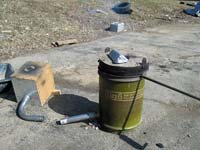
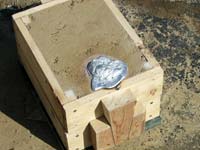
Here’s the crucible waiting its turn. Remember to be careful about setting it on concrete when it’s hot. If you spill molten metal on concrete, it can explode. (I said that already and I’ll say it again. It bears repeating.) I have fire brick to set the hot crucible on.
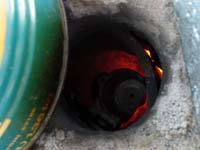
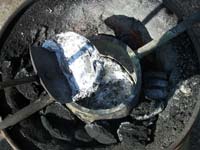
Use only enough blast to get the crucible dull red hot. Too much air will eat your crucible like a cutting torch, and then your aluminum will leak into the fire. Did you know that aluminum burns with a terrifyingly hot, greenish flame, and deposits greenish oxide all over? This makes sense if you remember that aluminum powder is what makes thermite burn so hot. Try to avoid experiencing that firsthand. If you are getting the crucible only to dull red, you probably have a carburizing atmosphere in there, and little to worry about. Orange it too hot for aluminum, and risks an oxidizing fire unless you break your charcoal rather small. Here you see the crucible at temperature with an unmelted piece of aluminum in it.
Speaking of charcoal, another problem is clinker. Charcoal briquettes are cheap and convenient because it is easy to break them in half by tapping on the end with a hammer. This is a nice size for this kind of furnace. But briquettes have coal dust in them, so they will form clinker, which is a nasty mass of glassy, black leftover junk. We don’t notice this in a barbecue grill, but you go through fuel a lot faster with blast. If you find yourself adding more and more blast to maintain the same heat, you probably have a layer of clinker blocking your air. Lump charcoal costs a lot more and takes more effort to break to the right sizes. But it is probably worth it if you’re not doing a lot of this. Wood doesn’t make clinker! However this becomes more of an issue when you burn all day and run through a few backs of charcoal to make ingots. This project took less than a bag, which wasn’t enough to build up clinker with name-brand briquettes. But the cheap stuff would have because it has more coal and less wood.
Melting
Not much to see here, really. On top of the furnace is an ingot preheating. (Above you also see a coffee can of small scrap preheating.) Even preheated the ingots usually freeze the contents of the crucible when you add one.
The general rule with aluminum is to cook it no more than three minutes past when the last of it melts. Beyond that you can overheat it and cause gas bubbles to make your casting porous and weak. (Try to avoid a lot of stirring for the same reason.) This is also a good amount of cooking before adding more metal to melt.
Once we have enough metal melted, we skim. Some folks mount a thrift store stainless steel slotted spoon on a long handle. My skimmer used to be a fireplace shovel, which I cut and bent to fit my crucible, then cut slots in. The idea is to remove the spongy oxidized junk from the top and leave behind the shiny molten metal. Whatever you use, preheat it before sticking it in your metal or you’ll suck out too much heat and freeze the metal. (Doesn’t it feel strange to talk about freezing at over 1000 degrees F?)
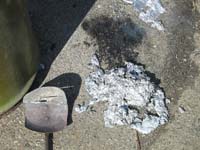
Here’s the spongy, oxidized stuff I took off the top. You don’t want to put this on concrete, because the water in it can cause explosions. This is asphalt, so it just melts and burns. I should have had my ingot mold handy.
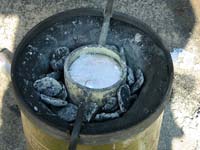
And here’s the clean metal, ready to pour.
When we pour it has to be smooth and fast, keeping the sprue choked with metal the whole time. I don’t think I have ever fully achieved that, but I try to get as close as I can. Obviously I couldn’t take a photo while doing that, but here’s the result.
Let it cool for a while before attempting to shake out the mold. This is not just for safety—hot metal oxidizes much faster, and you get a poorer finish. After we shake it out it looks like this.
Now the real work starts. The sand near the casting gets baked dry, so it needs to be reconditioned. While the casting cools more I break it up with a hammer, add a tiny bit of water and mash it in. The water has to be forcibly smeared into the tiny grains of clay between the grains of sand. If you add too much water the steam will destroy your castings and cause dangerous bubbling. It should feel about like brown sugar. Unfortunately, it takes quite a bit of brute force mashing to get it there. People who do a lot of this end up building powered sand mullers.
After mashing the sand as much as I can tolerate, it’s time to finish the castings.
Casting Defects
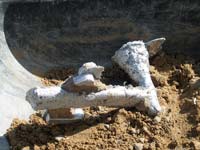
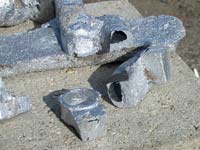
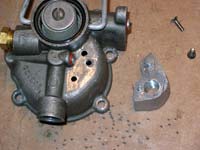
First we saw off the gates. This is easy for the float bowl casting because I made the “nose” of the part extra long to allow an easy cut next to the gate. This is a little harder with the other one. I should have made the pattern deeper so I could do the same thing. But I didn’t. For now we’ll leave the gate attached. I also cut the sprue off the runner so the remnants will fit in the crucible next time.
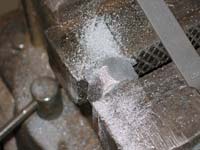
Notice I have a defect! The sediment bowl casting has a small gap near the top, and a large gap in the gate that fed it. I guess I should have added a riser there so there would have been more metal to feed that gate.
The void goes all the way through to the inside of the bowl.
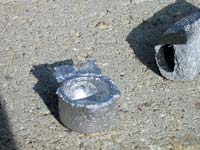
Fortunately this is the area I will be drilling out anyway for the hose barb. I think it will be close enough that I can fill it in with JBWeld. Most of the threads should be in good aluminum. For a part that needed to take more heat I would have to start over and get the risering right.
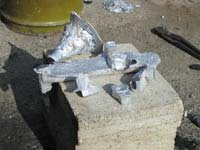
This experience also makes other metal defects more interesting. Here’s cheap Asian a wrench I broke.
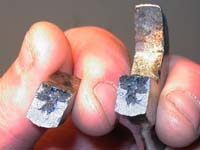
Check out the black crystals. I guess too much carbon managed to concentrate itself in an inconvenient spot.
Finishing the Castings
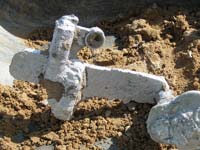
The sediment bowl casting needs hardly any filing because of the long “nose” I added to the pattern. This let me cut the gate off far from the casting itself. I could have done the same with the bowl drain casting if I had made it a bit deeper, but I didn’t. So I had to cut though the gate. Fortunately aluminum cuts relatively easily.
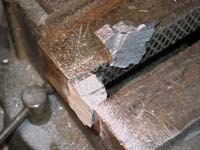
Then I had to file off the extra gate that was left behind.
From here the sediment bowl casting is pretty easy to finish. We center punch the end of the “igloo entrance” and bore a hole to the inside of the bowl. (For accuracy, start with a 1/8” bit and work up in three or four stages.) Then we tap it to 1/8” pipe thread and lap it to make sure it seals. I needed to file a bit of the “nose” that interfered with the lip on the carb.
You can see where the defect ends up. This should be easily filled with JBWeld, and then the threads can be chased with the tap. From there we only need to add the hose barb with some yellow Teflon tape.
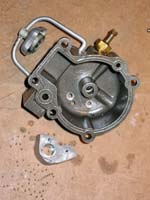
The other piece is a little trickier. First we make sure it fits the bottom of the float bowl. Well, I bored and tapped first.
Note that I had the other casting in place when fitting this! It would have been very frustrating to fasten the casting in place only to find out it interferes with the other casting! Or something else, for that matter. It is not a waste of time to hot glue it in place and screw the whole assembly to the motor and make sure nothing interferes.
Then we trace the part onto the bottom of the float bowl and use this to carefully drill two small holes in the float bowl. Make sure they are not too close to the edge or you won’t be able to fit the counterbore.
Then we clamp the new piece in place and finish boring the holes. Then the holes inside of the float bowl can be counterbored so the screws will seat flush, and the new piece can be tapped. Note that the drain hole in the float bowl is only 1/8” This is plenty.
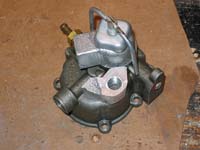
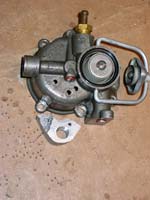
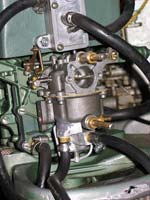
Finally we test fit, screwing the new piece to the bottom of the float bowl and adding a hose barb. (Hopefully you can still turn the hose barb!) Once this is done, we take it all apart and clean the mating surfaces with acetone, then JBWeld and screw it together. I fillet the edges with JBWeld too. With the addition of the hose barbs, we’re done! Here’s the carb with both parts installed.
Of course I used the cheapest form of valves available – end caps.
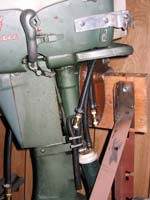
This requires a wench or two for the draining, but I find that a lot easier than taking the cowl off. And if the hose ever gets a hole worn in it, I can unscrew the hose barb and replace it with the plug and keep on going. I guess time will tell if it really saves me any carb rebuilds.
Next time we will look at casting other metals.
Rob Rohde-Szudy
Madison, Wisconsin, USA
robrohdeszudy@yahoo.com
|