Part 1 - One of Those
Part 2 - This Small Space
Part 3 - So Where's This Boat of Yours?
Part 4 - Planking Nightmares
Part 5 - It's All Downhill from Here
Part 6 - The Routine
Hands up those who say they don’t have enough space to build a boat. Ok now take your hand down if you can bring a full size sheet of plywood into your basement, shed or so called workspace. Out of the hands left up, who can lay that sheet down anywhere after you move all your stuff, you know what I mean, your lawnmower, snow-blower, bicycles, lawn furniture, canoe, Christmas decorations, And that bus seat you never managed to throw out that the family dog has now claimed as his own. Not many hands left up are there. The trouble usually is that we plan a boat bigger than the space so it’s easier to say “I don’t have room.” You can always make space work for you. I’ve seen articles where people have built kayaks, row boats and sailboats in apartments and removed the window to lower it down the outside of the building. Now that’s dedication people! My situation is not so extreme, but nor do I have a boat shed and slipway. 11ft x 21ft is my basement workspace with a 250 gallon oil tank in the corner.
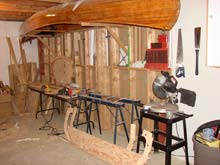 |
My boat is going to be 6 ½ ft wide and 17 ½ ft long. Picture that in your head. It’s tight. But with some cleaning up, it “appears” to be bigger. And you know what? I’m not a bit worried about it. I know that when the boat is done, it will be coming out some way somehow, and I know where to get a chainsaw. But I digress. |
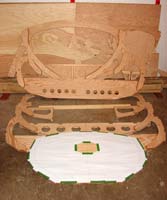
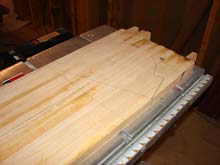
| With the success of the first two frames, the other frames came quickly. Within a couple of weeks I had made a frame kit. However I had no transom yet. I intended on having a fancy bright varnished transom so I searched many of the local lumber yards looking for that perfect piece. Nothing. I searched again another day for a nice piece that would do the job but need some work. Nothing. Finally I went to the closest lumber yard and picked up a thick piece of ply surrounded by a host of other mediocre lumber. It would have to do. It was unceremoniously brought home on the roof of my car and cut to the shape intended for a transom. |
 |
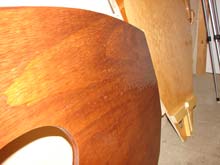 |
It was a pale yellow color and I wanted a rich oak/teak color, and stain would be the answer. I tried a couple of test pieces first with the scraps, and met with some success. But when I applied it to the new transom and laid down the first coat of epoxy... ruin and torment met me. I had what’s called in painters’ circles as “fish eyes”. |
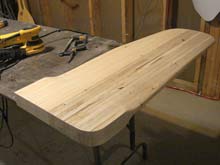
| Some sanding and an additional coat never helped. In a nutshell after much sanding and testing later, I went and bought a piece of ¼” oak ply and glued it to the back face of the transom, epoxy applied and put aside. |
 |
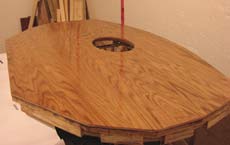 |
Done. More sweat went into the transom than did the whole rest of the frames, lesson to self: “sometimes it’s not worth the effort”. That better be the last issue I have with this boat, I muttered. Did I mention I’m lazy? Some people call me efficient, but it’s only a method of doing less work. |
With limited space I need to plan the building of everything carefully. The next item on the list was the centerboard and Rudder assembly. The Centerboard forward half was to be made from hardwood. I checked at the local lumber yard for some hardwood. Maple would be nice and hard I figured. Looked at the price... then looked again. No, I ’m not wrong, $78 for a piece of clear 2x4 maple 8ft long. I don’t think so!
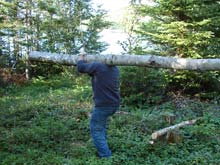
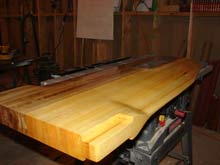
| The next trip to my home town, a maple was felled, <pic6> carted to the mill for sawing and then tied to the roof rack of the car. $25 for gas, and $10 for sawing. No less than 4 planks 2x5 x 12 ft long. Enough hardwood for all my needs. |
 |
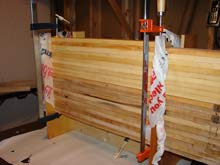 |
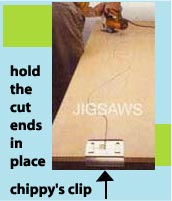
I set up a jig made from old cupboard doors (A story for another time) to hold the strips of wood in place. This would help me clamp and align the pieces better. The strips were coated on one side and placed in the jig. Once all the strips were in, I lightly clamped the whole thing until the glue set. The same procedure was used for the rudder blade. |
| Once broke out of the jig, they were both rough profiled using my grinder and belt sander. The grinder though a dirty weapon, has done me well over the years. With care and finesse it makes quick work of wood, especially when equipped with a 24 grit disk. |
 |
 |
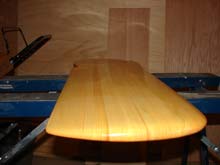
To ensure I made the correct shape I made a profile template from a scrap of wood and would regularly check to make sure I was on track. |
| A straightedge was placed perpendicular to the profile on occasion to make sure it maintained an even curve, like an airplane wing. I kept that line of thought as I faired both of them. It was messy but in the end, “wing like”. |
 |
According to the plan, the Centerboard required 50lbs of lead to be placed in the lower end. Lead is not as common to acquire since the whole kids health scare and the discovery of its toxic properties. A toy laced with lead paint is treated like toxic waste. A far cry from the days when I and my friends would play trucks in zinc mine tailings piles. I know now why our Tonka’s didn’t rust. Luckily here in Newfoundland, Winter tires are a must and twice a year people change their tires, which need new balancing weights... Bingo, lead. Most of it goes to recycling. So I claimed some when I got my tires changed over. As much as I could muck off with.
 |
I borrowed a burner used for cooking lobsters, an old pot and I was in the forging business. With all safety precautions in place such as welding gloves, vapour filter mask, goggles etc, I proceeded to melt 50 lbs of lead. |
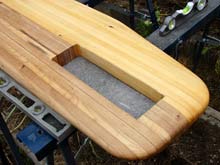
| The way I made my slug was to pour it directly into a hole cut in the centerboard, with a panel screwed to the underside to make a bottom to my form. |
 |
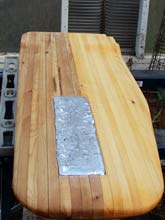 |
The centerboard was made level at the hole so the pour would completely fill the hole without spilling. The pour went quickly and in no time the mold was full. Once it cooled I went to bring it back inside the house. At first it didn’t seem to want to move. I looked to see if it had somehow welded itself to my supports, nope all ok there, I put more effort into the next attempt and it lifted off the cradle. Now I clued in that I had brought a 45lb centerboard outside, but now was 100 lb to be brought back in. I don’t think I have any worries about this thing wanting to go down in the water. |
| Both the rudder blade and the centerboard were given a couple of coats of epoxy and set aside for more work later. |
 |
 |
I have no glass cloth yet to cover the centerboard or the upcoming centerboard case so that situation has to be remedied soon. |
Next on the list... mast boom and gaff. Now how do you make that birds mouth thing? I have a very short time to master the art of making a mast using the hollow birds mouth method. This should be interesting, more wood for the potential bonfire. My wife asks what am I doing with my time? She sees no boat anywhere, just a bigger pile of wood.
***** |