|
Planking the whaleboat - Spiling
Spiling
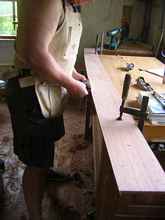
The spiling batten is a flat piece of wood that fits on the boat
mold within the confines of the space defined by the plank measurements;
the batten should be somewhat overlong; you spile the curve beyond
the actual length of the plank pieces so that the scarf is fair.
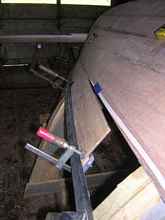
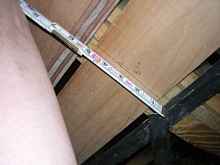
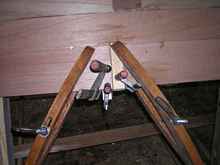
The spiling batten should lie flat on the mold; the clamp nearest
you shows a small spacer to bring it down flush with the planking
batten. The blue tape shows the position of the anticipated scarf
joint. Using a compass, trace arcs along the length of the spiling
batten using the lap line as the reference.
 |
Compass arcs to determine upper plank line |
Transfer vertical measurements to the spiling batten at the
ribs and spaced intervals, writing down the distance between the
lap line and the planking batten every 12” or so: 6-1+ in
this case at station 4.
 |
Vertical measures of plank thickness |
When all these measures are done, take the spiling batten to
the plywood planking stock. Using a smaller batten, join the arcs
on the spiling batten into a matching reference curve by driving
nails where the arc meets the edge of the small batten.
|
Connecting the compass arcs |
Draw the line , mark the interval vertical distances on either
edge of the spiling batten.
|
Transferring line to planking stock |
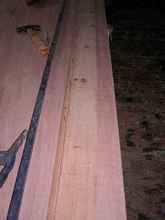
Then transfer the arcs onto the plywood, allowing for width
needed on the final plank. Redraw this line using the small batten
to the outside of the nails, and then measure the interval vertical
distances off the small batten.
|
Using batten to draw line on planking stock |
These points become the bottom edge of the complete plank, and
are connected with the small batten as a fair curve guide.
|
Scribing lower plank line with batten |
Cut it out and plane it to the line. I like to clamp it to the
bench and use a hand plane and then finish with a stanley 95,
to ensure a square edge.
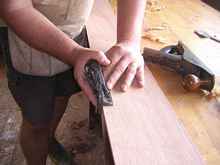 |
Clean up with stanley 95 |
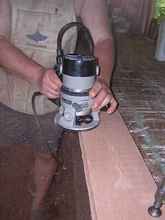
This is important because the final step involves copying this
hard-won plank using a pattern bit router, which takes about 5”.
The whaleboat requires 4 spiled pieces per side
Scarfing
Now the plank pieces need to be joined together with scarf joints;
these are beveled to a 1:8 slope. One could glue up all the scarfs
and then glue the plank on; I have found it more convenient to
do the two end scarfs, fair them, and then do the middle scarf
as the plank is glued on; this makes it a one man operation. Lay
the plank sections on the boat in position and mark the overlap
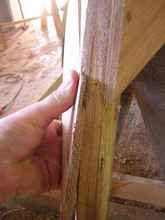
(3” in this case for 3/8 “ plywood). I like to write
“s” on the surface that is scarfed and “no”
on the side that is not (been there, done that mistake).
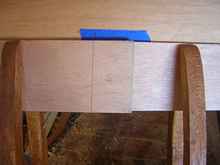 |
Marking scarf overlap |
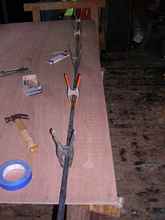
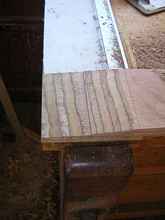
The planks are then stacked with the scarf sides up and planed
together. This picture below shows about how far I am willing
to go with the power plane.
It is then finished up with hand planes.
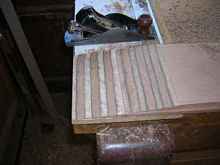 |
Finish scarf |
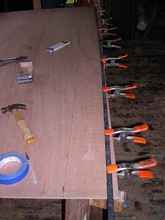
The uniform ply sections show it is flat and fair. Now the two
sections of plank can be glued together while aligned on the boat.
Don’t forget to tape the lap bevel (clear plastic packing
tape) at the scarfs, or you will be cutting them off. After the
glue is dry the edges are cleaned up and, if there is any unfairness
to the appearance of the edge line, it can be smoothed out on
the bench.
 |
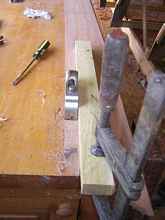
Clamping scarf |
Some tape leaves a residue on the bevel; be sure to clean it
off so the epoxy will penetrate.
Rabbets 2
Finally the rabbets are cut on the plank edges. With the planks
clamped in position on the boat I mark the overlap of the lap
line and then cut it out on the bench. The depth here is only
a 1/3 of the thickness, giving more strength to the outer side
of the final rabbet joint.
Take it down to somewhat less than you think you need, and put
it on the boat to see how it is coming.
Also at this time do the final bevel on the stem; the landing
surface on the stem needs to be flat so that the plywood is not
forced to bend in two directions. Place a block plane on the stem
bevel surface and rock it to find the high spots.
All that needs doing now is marking and cutting the final scarf,
rounding the inside edges of the planks halves, and sealing the
inside edge with two coats of epoxy; this sealing step saves time
when it comes to finishing off the inside. Also seal the bare
wood of the the faired ribs with two coats
Some notes about epoxy. I use WEST and have been very satisfied
with it (and their customer support line), but at times the coated
surfaces will develop an “amine blush” which prevents
paint adherence. It is easy to wash off with just water but forgetting
to do it will, in the words of one of my instructors, “hurt
your feelings”. Epoxy also forms precipitates if it get
cold, so I keep my containers on an orchid warmer mat in the winter.
Chose your hardener for the operation: I use “fast”
when I am doing multiple coats in a day, and “slow“
when I want working time (see plank gluing error above). Mix it
in smallish batches (6-8 oz) and plan on using it up before getting
more. It is also possible to conserve glue by, for example, gluing
half the plank down, collecting squeeze out, and using this residue
to continue gluing. Epoxy is expensive. I also place the foam
roller and brush from the first sealing coat in the freezer while
waiting for the coat to dry so I don’t have to saturate
another roller for the second coat. I clean up with vinegar which
works well and is far more pleasant (and cheaper!) than alcohol
or lacquer thinner.
Before the final glue, mark the rib landings on the plank pieces
(glue goes there too ), and lay out glue along the lap line and
its mating surface on the plank. Don’t forget to retape
any areas of the molds that were marred in the fairing process
so the planks won’t stick to them. In the final glue up
I put the bottom scarf piece down first; I saturate the scarf
with unthickened epoxy before spreading out the thickened glue.
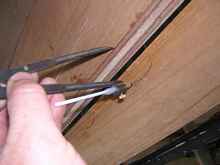
Sight along the scarf to make sure the line runs fair; It can
be tweaked a bit after it dries with a shoulder plane if needed.
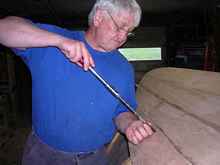
The stern photo shows a scarf, marked with a pointer.
To my eye it looks a little high there, and maybe I should take
off a 1/16 or so just for looks.
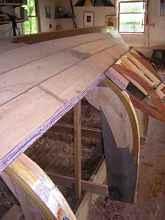
Here’s the final appearance.
 |
Clamps in place |
When the glue is dry I put screws in the stem ends and at the
ribs; Some designers say it is unnecessary, but it makes me feel
better.
 |
Screwing to ribs |
You will note my use of so-called antique tools. Most of these
tools I have from Ebay. They are cheap (where collectors have
not taken notice of them), fun to use, and highly functional.
The Yankee screwdriver for example, allows rapid screwing with
subtle control, just the thing for fragile bronze screws where
a power driver might mar them or snap them off.
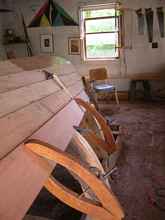
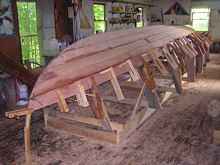
The final photo shows the lay out of the last three planks.
 |
Final plank layout |
The interior is next.
*****
|