|
When I decided to build my current boat, I did not set out to
build a trimaran, but rather I had some specific criteria that
I wanted and needed to meet in a sailboat. (1) it could be car
topped (later this requirement changed), (2) didn’t require
a motor (3) could be stored in the 2' x 3' access to the crawl
space under my house, (4) It could be managed by myself. It turns
out that the answer to these was the Jim Michalak designed Trilars.
 |
 |
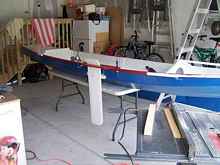
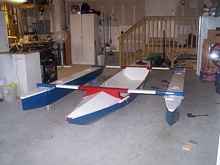
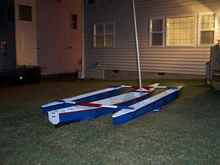
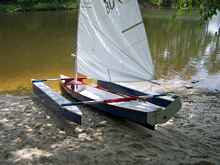
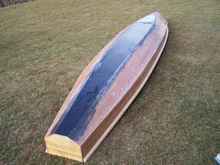
The Trilars is a 15’ trimaran, whose main hull can also
be used as a double paddle canoe. The sail rig consists of at
set of 2X4 cross braces (akas), 12’ floats (amas), mast,
sail, rudder and leeboard. The boat can be disassembled and transported
on a roof rack or utility trailer. It can also be trailer in its
assembled state. All can be done single handed. In order to build
the Trilars one needs to purchase two sets for plans (supplied
by Duckworks of course) the Larsboat
plans (main hull a.k.a. the vaka) and the Trilars
sail rig which includes the details to build the floats and cross
braces (amas and akas), rudder, leeboard, mast and sail. The cost
of these plans together is less than half that of other trimarans
the same size.
The boat is built using the stitch and glue method for the Larsboat
main hull and amas. Leeboard, rudder and other sail rig parts
are made from ¼ and 3/4” plywood, the mast is made
from 10’ and 12’ 1x3 pine and boom was cut from a
10’ 2x4. Provided here is a high level look at this boatbuilding
method another great article on this topic is Gary Blankenship’s
article of building a Wooboto.
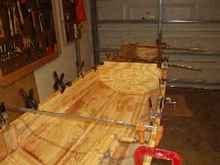
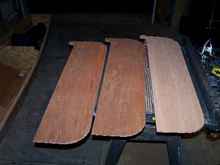
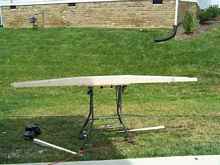
Building the Larsboat Hull
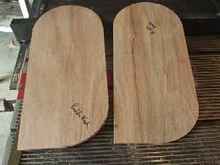
From the plans the bulkheads and temporary forms are measured
and cut out of ¼” plywood. Then framing sticks are
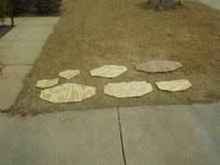
glued along the edges. The hull sides, bottom and bilge panels
are lofted on to two sheets of ply which are coupled together
with a 3” wide butt strap (I piece of ply glued to the sheets
set end to end). Once the panels are cut out you end up with a
set of parts that looks like a boat kit.
|
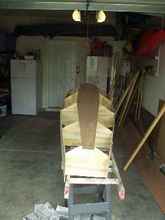
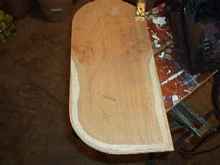
The sides, bilge and bottom are attached to
the frames and bulkheads, nailed and glued with thickened
epoxy. |
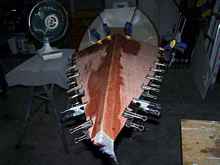
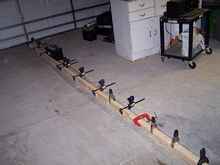
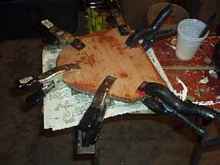
The panels are stitched together then seems are filled with
thickened epoxy and covered with fiberglass tape soaked in epoxy,
both inside and outside seams.
 |
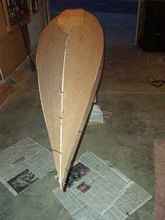
A layer of fiberglass cloth is applied to the
bottom, followed by a couple of coats of epoxy mixed with
graphite for extra abrasion resistance. |
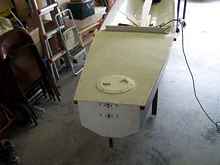
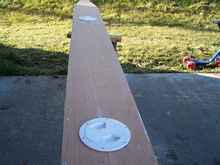
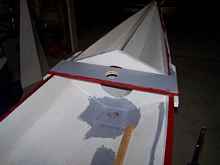
The rear deck is attached with caulk and screws, the front deck
is set up has a hardtop convertible. Note the screw out port to
allow access to the rudder hardware under the rear deck.
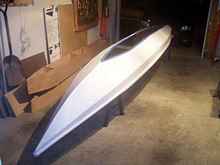
Finally primer and paint and you have a boat.
Making the Sail Rig
The sail rig consists of basically five components, rudder,
leeboard, cross braces, floats and the mast, boom and sail. Each
is described below:
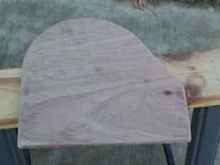
Rudder - the rudder is set up to be a kick
up style. It is composed of the rudder cheek, the rudder blade,
a set of standard dinghy pintles and gudgeons and a push pull
steering stick. The blade and cheek are made from layers of ¼”
ply glued together. The blade is the feathered to produce an efficient
profile. The rudder blade pivots on a bolt that passes through
the rudder cheek. The push-pull steering stick is attached via
an eye bolt and wing nut from the control arm thorough a hole
in the stick.
 |
 |
 |
 |
 |
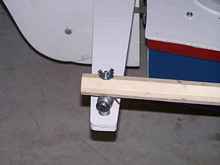 |
Leeboard – the leeboard set up is very
simple, extra blocking is attached to the side of the main hull.
A pivot bolt is inserted from inside the hull, through the blocking
and leeboard. The leeboard guard is bolted to the gunwale and
stops keeps the board vertical when there is lateral pressure
while under sail. I added a releasing cam cleat to the top of
the leeboard guard and a small diameter rope is tied through a
hole in the leeboard and is held fast by the cleat, this keeps
the leeboard from floating up.
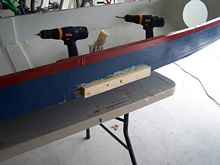
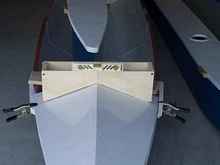
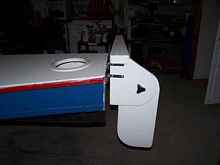
Akas or Cross Braces – these are made
from 8’ 2x4 studs. The front brace is built with a cradle
to fit the front deck and ¾” blocking on the ends.
The rear brace fits on the rear deck and the blocking is in the
section that sits on the deck. Both braces are bolted to the gunwale
which is double thickness at the connection points.
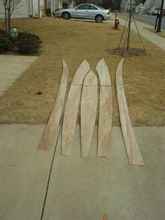
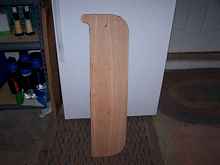
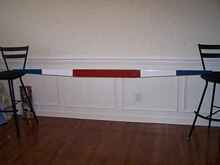
Amas or Floats – These are built up with
the same basic steps as the main hull, except with a square cross
section with the ends pulled together and slightly upturned at
the bow. A set of frames are cut with ¾” framing,
sides, bottom and deck are nailed and glued to the frames. Seams
are filled with thickened epoxy and reinforced with fiberglass
tape and epoxy. A 1” x ¾” sheer strake is added
so the deck can be caulked and screwed into place. The strake
is doubled up where the bolts for connecting to the akas will
be used. Two screw-out ports are used for ventilation. Finally
sanded primed and painted.
Mast, Boom, and Sail
Mast – the mast in the plans is 16 ½’
long and roughly 2 ¼” in diameter at the base tapering
to 1” at the top. It is made from 3 layers of 1x 4 glued
together then planned to the specified thickness. I was satisfied
with the basically round shape I was able to achieve with a hand
plain, there are lots of other ways this could be done. (Fancy
sanding devices with a drill, using a table saw to make an octagonal
shape, birds mouth etc.) Mast step and mast partner from ¾”
plywood, primed in grey in picture below. I made the 10’
by 1 ½” square boom by simply cutting down a 10’
2x4.
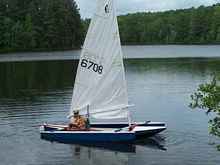
When I first built the boat I had purchased a used sail (International
Penguin) on ebay. It worked well and I needed to make the mast
longer than the one provided in the plans. I probably could have
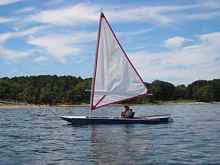
made it even longer for better head clearance. This past summer
I made my first polytarp sail.
I would say the main hull could be built in 60 to 100 hours based
on the skill level of the builder and the level of finish. 40-50
hours for the sail rig. For me this period of time took 4 years,
but we also moved twice along with a lot of other “excuses”.
That does not include sail making time, I purchased a sail on
eBay, later I made one of white polytarp, as the cost of a new
sail is a bit painful.
Building a Trilars could probably be done for as little as $300
if using standard lumberyard/home improvement store grade materials
(luan or BX plywood) and Fiberglass Resin. I imagine using marine
grade Okume or similar and epoxy could double, triple or more
the cost – the decision of what materials to use is an age
old debate, and you can find opinions all over the internet. I
used Luan ply and epoxy. I had some problems with the Luan on
this boat, and I didn’t with a Toto canoe I had built some
years back. It seems the quality can be hit and miss.
For additional information and pictures of the Trilars see the
Trilars homepage at https://buildboats.com/trilarshome.html
Also see the Small Trimarans website: https://smalltrimarans.com/blog/?p=1637
And, Issue #64 of the great magazine Small
Craft Advisor.
Plans here on the Duckworksbbs:
Larsboat (main hull):
https://www.duckworksbbs.com/plans/jim/larsboat/index.htm
Trilars (sail rig):
https://www.duckworksbbs.com/plans/jim/trilars/index.htm
*****

|