
 Custom Search
|
|
| sails |
| plans |
| epoxy |
| rope/line |
| hardware |
| canoe/Kayak |
| sailmaking |
| materials |
| models |
| media |
| tools |
| gear |
 |
 |
| join |
| home |
| indexes |
| classifieds |
| calendar |
| archives |
| about |
| links |
| Join Duckworks Get free newsletter Comment on articles CLICK HERE |
|
|
| Building the Charlie M |
by Dave Calloway
- Los Angeles, California - USA |
Two years ago, infected with the desire to build a boat, and after endless happy hours looking at internet sites, plans, and do-it-your-self "instant" boat books, I chose the "QT Skiff" design by Jim Mickalak. I was looking for a light, easy to build "car topper", and the QT fit the bill to a "T". Several considerations went into the selection process. I wanted the finished boat to be light, but strong. I wanted stitch and glue construction, which the design is not. But I really liked the narrow efficient shape, and yet, room for "stuff". I wanted to use it on the protected waters of the Los Angeles Harbor. I wanted something under 14 feet, the maximum allowable length at most dinghy docks in the area. Jim has two different variations of the boat, one for rowing and the other for power; I built the power version.
So I wrote to Jim to ask his opinion and permission to build the craft stitch and glue, without the external chines. He graciously replied he thought it would work fine. His request: I keep a log and report back. So here goes.
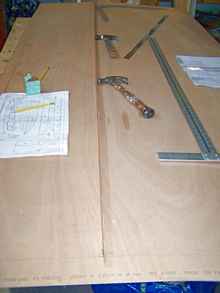
My inherent cheap streak lost out to my yet to be discovered pride of craftsmanship, so I went with the expensive and very light Okoume plywood, and it was the right choice. I found it tough, strong, and light in weight. It's easy to tool, holds epoxy glue well, and doesn't surface check and crack. So after I promised my wife it would only take me a few weeks to assemble (yes I got into trouble as time dragged on), I started laying out the pieces in the garage.
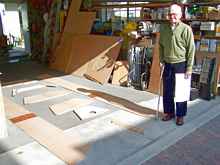
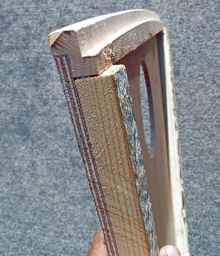
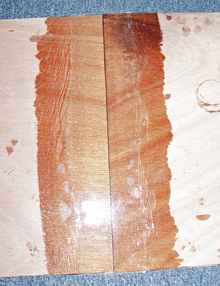
I decided to enclose the forepeak for floatation and somewhere to stow the required registration papers. I made the form for the #2 station with a maple beam across the top; slightly curved and with a square notch planed into the face to accept the 6mm deck plate. I added a hole to accept an access port. I laid out the lines.. Cut out the parts.. And butt spliced the 4mm sides and 6mm bottom parts with 6 ounce fiberglass cloth and epoxy resin. I did both sides at the same time, using waxed paper to keep things from sticking to the press boards and weights (The Payson method).
I chose the thinner plywood for the sides, knowing I would glass the entire exterior; otherwise, if not, I would have used 6mm.
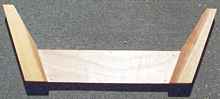
Seat frames (redwood and cedar) cut and assembled, stem (douglas fir) is cut out. The transom is built of two layers of 6mm ply and one of ¾ marine fir ply. Note the pretzel container water weights. They work great, and store easily later.
I had 4 legged help in getting these empty. His name is Wooster, and he's now on a diet.
The next step was to tack it all together. Silicone bronze ring nails are great for this job. They go in easy, don't come out. Both the ply and the seat frames & forepeak bulkhead were coated in clear epoxy and then glued in with thickened epoxy. I cross checked the length of the diagonals to be sure there was not any warp or twist, then let the epoxy kick. Already begins to look like a boat. Nice.
The gunnels are douglas fir, and they are inverted from the original plans. I did this so that when the boat is turned over for storage, the water runs off and doesn't collect against the sides of the hull. Note they are two laminated pieces, to provide strength. The outside strip is glued on with epoxy without nails. I broke one of these when bending on and had to make a hasty scarf. Lesson learned: dry fit all parts before smearing with glue.
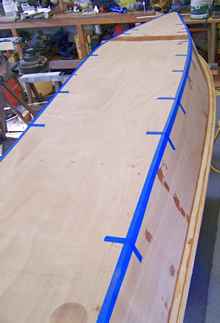
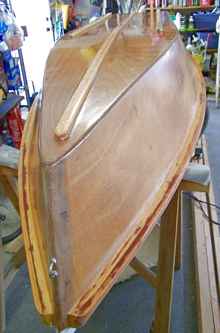
Next, came the bottom. I pieced the 6mm plywood with a 'glass butt, cut it out with a good margin around the markings, and then trimmed to match the sides. I then glued the frame to the bottom joints and attached with the bronze ring nails. The edges were then taped to provide backing for the epoxy fillets and glass seam tapes on the inside.
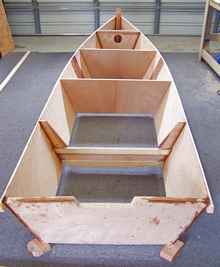
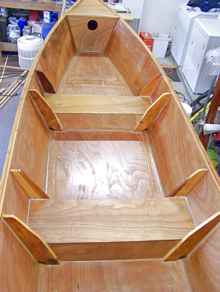
Then I flipped the boat over to work on the interior. The interior has been taped and sanded and the mold frames removed. Note the limber holes in the frames for water drainage. Here you can see the second seat I added, which is not on the plans; it makes a good place for a second person.
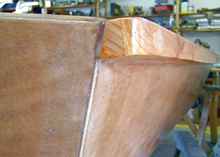
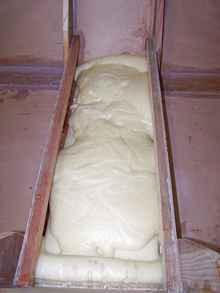
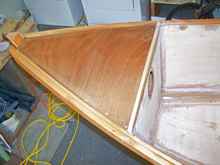
I then installed limber-hole cross-over pipes in the seats, made from ABS 4 inch drain pipe (cut into thirds length-wise), filleted in with epoxy to seal the seats from water. Then came the foam to fill the seats for floatation. I put in 4 cubic feet (2 pound closed cell), two CF in each seat. The bow detail to make the watertight compartment. I coated the interior of the compartment with epoxy before closing with the bow deck (I did not use a bow gusset, as the deck plate did the same job of tying the two sides together - I should add that I didn't use gussets in the stern either: I felt the epoxy filleting, taping, and bronze nails would do the trick - so far, so good).
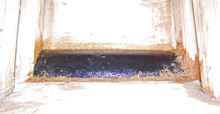
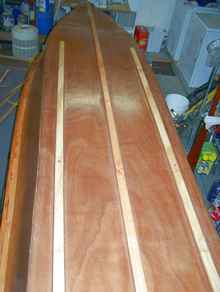
The interior epoxyed and ready to be turned over to finish the bottom. Here you can see the round opening for the access port. The seats have been sealed on all sides. The bottom, after glassing with 6 ounce cloth, two layers on the chines, and with the battens attached after the glassing. The battens were glassed in as well. I won't bore you with the hours of sanding, etc.
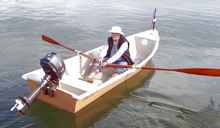
She's ready to paint at last. I chose a one part polyurethane. I bought all the paint, primer, and thinner from the same manufacturer, as recommended. It all went perfectly. I weighed her at this point, 123 pounds. An easy two man carry. I keep her on a small trailer. Oarlocks and canvas edging are added... .. Afloat on the water. With the 6 horse outboard, "Charlie M" runs very smartly. Steady, smooth, and fast, just like the man she's named after.
|


To comment on Duckworks articles, please visit our forum
|

 |