Part 1 - Part 2 - Part 3 - Part 4
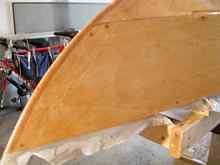
After filling the gaps and screw holes, and a ton of sanding, I was ready to do the glassing. I was worried about this. I'd used strips of fiberglass cloth in epoxy on the joints on my other boat, but couldn't afford the epoxy required to do the whole hull back then. So I put it off a while by setting the hull upright and learning how to make epoxy putty (with some stiffener and sawdust) and get it into the interior of the hull, all around the stringers and keelson and daggerboard, and the joints between the ribs and plywood. This was a nasty job and seemed to consume a ton of precious epoxy. I mixed it usually two squirts of epoxy at a time, put it into a baggy with a tiny bit of corner snipped off, squeezing it out with the best approximation of a caulking gun I could achieve, and spreading it with a piece of epoxy "squeegee".
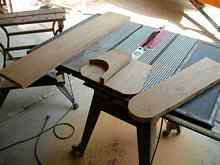
|
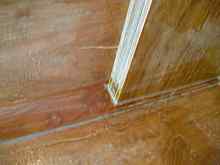
Epoxy putty laboriously used to create fillet for inside joints |
Ok, enough procrastination. on May 27th it was fiberglass time. Things went pretty well, though I was slopping epoxy wastefully until near the end when was getting the hang of it.
|
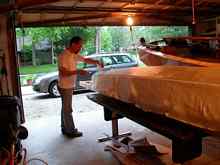
First time for everything, including squeegeeing epoxy onto fiberglass (that's me in the picture) |
The big hitch came when I was nearly done. The glass adapted to all the curves until the bow, where I had cut out to allow lapping over about 2" from one side, and (I thought) the same back across on the other. But my cut for the other didn't account for shifting/stretching, and the glass came up short. More foul language didn't help, and I quickly cut a piece of cloth to cover the miss. As it turned out, after two additional coats of epoxy to bury the weave, and sanding, all this nastiness disappeared under the final urethane coats. But it felt bad at the time.
|
My patch visible, required by miscalculating the cuts to fold the cloth over the bow |
The 2nd and 3rd epoxy coats squeegeed on much better and faster than the first, and since they were spaced 3 hours apart the whole mess was on that day. The sanding was nasty, and worrisome, as far as avoiding leaving too much ugliness, but also avoiding removing too much epoxy and exposing the fiberglass. This happened in one spot near the stern on the side, but the urethane hid it again so all was well.
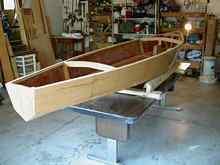
I scrubbed the epoxy with water and abrasive pad to remove the chemical that magically makes urethane sit for eternity without curing, and was delighted by the look of the birch with mahogany trim. Top and Inside and Test Paddle As it was time to work on the top and inside, I made a stand, which after puzzling came out a very simple design. Four 2x4s (that framing mentality again) set one way supported the boat upside down, and the other way right side up. Carpet strips tacked on protected the now important finished surfaces.
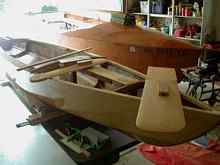
|
The bottom is done; time to work on the top and insides |
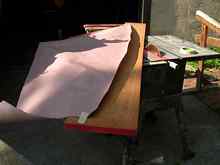
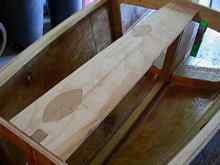
On May 29th, I started working on the mahogany pieces that would form horizontal surfaces along the sides of the cockpit area, and also the vertical pieces of the forward and aft of the cockpit. I bought two big 1" mahogany boards for this and also for the rudder, daggerboard, etc. I made a paper pattern to capture the curves of the sheer, comparing the two sides and hoping they were close, because I wanted to put one piece and then split it into two thin pieces by running it through the table saw on edge. It ended up working out ok. I cut the outer curve on the band saw.
|
Transferring the curve of the cockpit side pieces |
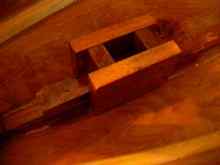
After smoothing the curve, I cut the inner curve with a router, making them 2.5" wide, since a) this is the height of my table saw blade and b) that would provide a nice symmetrical ½" overhang on the outside, and on the inside over the sheer stringer joint.
|
Cutting the inner curve of the cockpit sides on the router |
Hauling out the rib 2 and 5 patterns one more time (with adjusted/reduced deck curves!), I made the cockpit fore/after pieces as well much the same way. For symmetry and weight reduction I split them on the table saw down to 3/8", but of course couldn't get 2 for 1 as with the sides.
|
Cockpit fore/after finish pieces from mahogany |
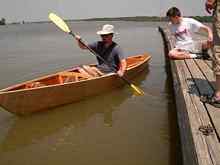
But it was a beautiful day that day, and heck the outside of the hull was done. So I let the family know I was going to test launch the boat and try it out as a kayak. We tied it on top of my wife's car, drove to Hoover reservoir, and gently set it in the water as my mom and Steven and my brother's and sister's families waited to see what would happen. I was delighted with the waterline and we all took turns paddling it around. Stepping into it for the first time was an eye-opener though. It was fine once I was seated, and like any other narrow hulled kayak or canoe. But I had unconsciously anticipated something more like my other boat with its 6.5' beam, and that experience of tippiness started a whole new line of worry that ended only the other day with the first sail: would it be manageable at all as a sailboat?
|
Steven watches me take the first stroke. no leaks, no structural failures, but boy is it tippy compared to my other boat! |
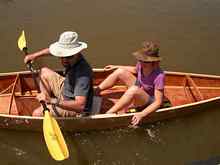
And as I promised Deb back in October when she caught me plotting to build another boat, there was room for two. Everyone agreed it worked really well as a kayak, provided a put a bit of rudder drag to help it track, which I did later on.
|
Hey it works just fine with Deb and I in there |
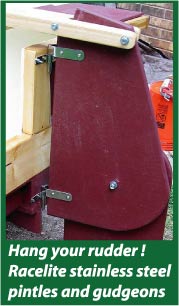
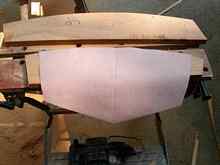
With the cockpit trim pieces rough cut, on June 3rd it was time to start on the rudder, daggerboard, and tiller. Here too I did a lot of head-scratching. I wanted a kick-up type system, with fully up position, low-draw kayak position, and then full down sailing position. I'd visited my friend, the Thistle builder Doug Labor of Great Midwest Yachts, and bought some Thistle pintles and gudgeons. They were bit hefty but familiar, since I'd used them on my other boat. It was a puzzle getting the mount points for the gudgeons on the tiny transom to work out, and the larger pintle brackets to work out with the rudder I had in mind. I finally decided I'd drill an extra hole in the lower pintle bracket which would become the axle for the pivoting rudder, and use the outer hole as the lock. Here's a picture showing some of the completed system, along with the trailer rig (more on that later).
|
Skipping ahead in time, the completed rudder, and some other details yet to be explained |
The cheek pieces I split on the table saw (5" max due to my 2.5" blade height!) and I decided a wooden cap with fiberglass reinforcement over it would be strong enough to house the tiller, and so far that has proven to be true.
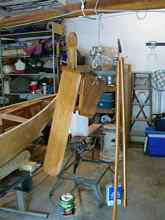
|
Pieces cut for daggerboard, rudder blade, and rudder cheek/housing |
After making the daggerboard top/cap, tiller housing cap, and the tiller and extension, there was massive shaping to do, and I freely confess to lots of belt sander usage.
|
Daggerboard, rudder, and tiller ready for epoxy |
After the epoxy and some nasty sanding, a couple of coats of urethane went on and I really enjoyed building these pieces from scratch and seeing them completed. Here's the screwy hanging rig for each of the coats to dry.
|
Daggerboard, rudder, and tiller finished-very sailboatish, and hanging from the mast of the other boat |
Around this same time, another perplexing set of details needed resolved, which is how to brace under the decks, and especially make the mast step. I'd ordered the sail but it was not due to arrive for over a month (as it turned out, Bill Tosh finished weeks earlier than he had promised), and I didn't want to try to make the spars without actually having the sail. But I wanted to finish the top, and that meant making the mast step. I finally settled on a single 1x1" piece of mahogany down the centerline to brace the stern deck, and a complex of bracing shown in the figures below to handle the forces of the mast.
|
Beefing up the center of rib 1, notched over keelson brace for mast step, and deck brace for mast. |
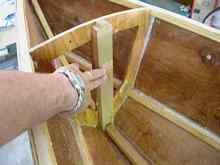
|
Bracing through which the mast will pass, 3/8" marine fir |
Although I was planning on a round 1.5" mast, I decided I'd assume I could have a 2" by 1" rectangular base to the mast, and built the mast step accordingly. It is massively strong.
|
The mast step, soon to be beyond access when the foredeck goes on |
Next: Closing the Bow and Stern sections
|