|
The Dinghy Project - Part 2 |
|
|
By Bob Means - Remlik, Virginia - USA |
Part 1 - Part 3
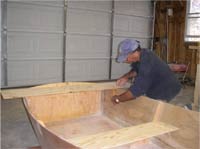
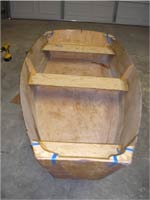
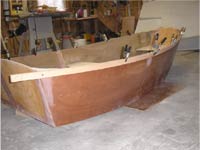
Our next step will be to attach seats and gussets.
You should have a little over half a sheet of 1/2" ply left over. Rip two pieces, grain going long way at 11". Reset your saw blade at 10" and rip another so you should have two at 11" and one at 10". Set the angle of your blade to 20 degrees and rip one of the 11" pieces, that will be for the aft seat. The other 4" piece cut in half and rip one of the 2" pieces 30 degrees at 10".
|
|
From the bottom of your hull, measure up 8" on both sides, foreword amidships and aft. That will be the height of your seats. |

|
|
Drill two pilot holes from the inside along the line and then take two sheetrock screws and screw have way into the hole from the outside. That will hold your seats in the proper place until the epoxy sets up.
|
|
|
Router to round the edges top and bottom of your seat pieces, don't round the 20 or 30 degree angle side. Those will join with fore and aft transoms.
|
|
|
Start with the seat amidships and place just forward of the mid-ship frames. Lay across the top and scribe a line. Measure the distance across and from your scribe line on the seat, measure over the width, slide the seat over the distance and scribe the other side. Take your jig saw, set the blade at 15 degrees and with your scribe line as the short point make your cut.
|
|
Both your fore and aft seats follow the same procedure, the 20 degree and for the aft seat and 30 degree for the fore seat.
|
|
|
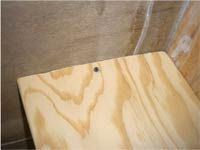
When the seats are fitted take a screw and screw from the edge of the seat at a 45 degree angle through the hull and then back out the screw. That will hold the seat in place as the epoxy dries.
|
|
|
 Mix epoxy with adhesive filler to the consistency of peanut butter. Apply liberally to the edges of the seat where they contact sides and transom and screw in set screws to hold the seats secure. Then take a squeegee and clean up around the edges top and bottom and fill any voids. Mix epoxy with adhesive filler to the consistency of peanut butter. Apply liberally to the edges of the seat where they contact sides and transom and screw in set screws to hold the seats secure. Then take a squeegee and clean up around the edges top and bottom and fill any voids. |
|
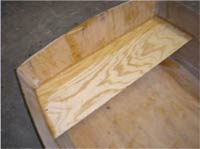
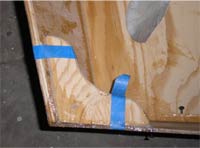 For your gussets cut 4 pieces of 1/2" ply into 6"x6" pieces (you should have plenty of scrap laying around). Cut two pieces at 20 degrees at 5 1/2" and two at 30 degrees at 5 1/2". Those cuts will meet bow (30 degrees) and stern (20 degrees) transoms. Hold over the top of the sides meeting the transoms and scribe a line up from the bottom along the side. Cut that line with jigsaw at 15 degrees. Measure 1 1/2" from edges and take a quart can and make a radius. Then take a large coffee can, place in the middle between the two outer radius's scribe and cut with jigsaw straight up. Round the inside edges with router. Apply a liberal amount of adhesive and place gussets at each end and tape to hold until adhesive sets up. For your gussets cut 4 pieces of 1/2" ply into 6"x6" pieces (you should have plenty of scrap laying around). Cut two pieces at 20 degrees at 5 1/2" and two at 30 degrees at 5 1/2". Those cuts will meet bow (30 degrees) and stern (20 degrees) transoms. Hold over the top of the sides meeting the transoms and scribe a line up from the bottom along the side. Cut that line with jigsaw at 15 degrees. Measure 1 1/2" from edges and take a quart can and make a radius. Then take a large coffee can, place in the middle between the two outer radius's scribe and cut with jigsaw straight up. Round the inside edges with router. Apply a liberal amount of adhesive and place gussets at each end and tape to hold until adhesive sets up.
|
|
| Remove the tape as the adhesive begins to harden.
Now we need to attach rub rails, sand and paint.
|
|
|
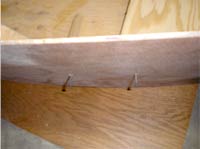
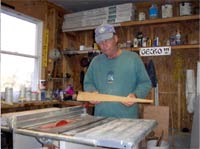
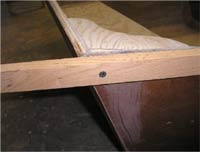 Rub rails, to start one needs two 9' long pieces of wood. I use oak because I have it. Fir or pine can be used also. These need to be planed down to 1 1/4"x1/2". Pre-drill a small hole for a screw in the upper edge near the aft transom and set the screw as shown, before applying adhesive. Rub rails, to start one needs two 9' long pieces of wood. I use oak because I have it. Fir or pine can be used also. These need to be planed down to 1 1/4"x1/2". Pre-drill a small hole for a screw in the upper edge near the aft transom and set the screw as shown, before applying adhesive. |
|
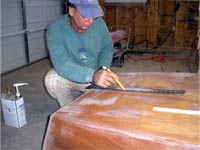
| Run rub rail along top edge using clamps as you go. Pre-drill hole near fore transom (about 1" from forward edge)
|
|
|
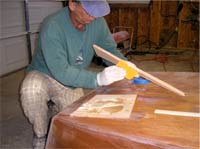
Back out screws until rub rail is free, leaving screw in rub rail and release the rub rail from the hull and apply a liberal amount of adhesive to the side that contacts with the hull. Re-apply screws through rub rail to hull and run rub rail along the upper edge of hull re-applying clamps and the final screw next to the foreword transom.. The adhesive should ooze out and take a squeegee to clean off excess.
|
|
| Run rub rail along top edge using clamps as you go. Pre-drill hole near fore transom (about 1" from forward edge)
|
|
|
| After adhesive sets up, cut off extended ends of the rub rail and sand smooth to match fore and aft transom.
|
|
|
 Remove the screws, sand the top of rub rail where it meets the hull so that when completed it feels like one piece. With a router round the fore and aft upper edges of the transoms. Leave the top edge of the rub rail sharp, just breaking the edge with sand paper. Remove the screws, sand the top of rub rail where it meets the hull so that when completed it feels like one piece. With a router round the fore and aft upper edges of the transoms. Leave the top edge of the rub rail sharp, just breaking the edge with sand paper. |
|
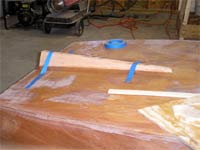
|  I use Oak but you decide for yourself what species you want to use. I cut a piece of rough oak 1x6 2' long and rip it to 3" wide. I use Oak but you decide for yourself what species you want to use. I cut a piece of rough oak 1x6 2' long and rip it to 3" wide.
Then scribe a line from one corner to 1/2" below the other corner and make the cut. |
|
| Measure the center of the bottom of the rear transom and using a framing square scribe a line 2'6" down the center of the bottom.
|
|
|
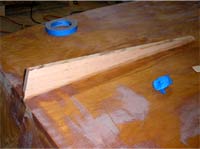
| Place the fin along that line even with the back of the boat and with a straight edge scribe a line to the angle of the transom. then cut that angle.
|

|
|
| Then plane the surface of the fin down to 5/8"
|
|
|
| Place the fin back on the bottom of the boat, even with the back edge, laying your pencil flat on the bottom scribe a line. That will give the small radius of the bottom. You can cut in that slight curve with a belt sander.
|

|
|
| Mix epoxy adhesive and apply liberally to the edge where the fin will meet the bottom |
 |
|
| Place the fin centered along the center line, even with the back edge and gently press the fin to the bottom until the adhesive oozes out, clean up the excess with a squeegee and tape the fin to the bottom until the adhesive sets up.
|
|
|
| After the adhesive sets up, remove the tape and your fin is attached.
|
|
|
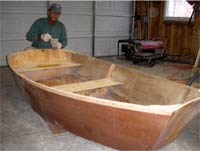
| Now mix up some epoxy and hardener and mix with about 50% denatured alcohol and saturate the whole interior of the dingy.
|
|
|
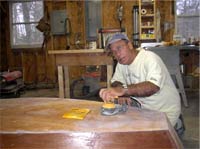
| After the epoxy sets up sand and fill inside and out. I use a Dewalt orbital sander, saves tons of work and does a real nice job.
|
|
|
Continue to Part 3

More Articles by or about Bob Means:
|