The Dinghy Project - Part 3  
By Bob Means - Remlik, Virginia - USA

Part 1 - Part 2


The paint I use is the cheapest exterior water based latex I can find. Believe it or not I find this hold up the best. I use a flat latex white for the base.

click to enlarge


Give the outside a coat.

click to enlarge


Let dry (it should be dry in less that an hour), lightly sand by hand and give another coat.

click to enlarge


Then I use the same latex based paint only semi gloss for the finish.

click to enlarge


Apply two coats and turn the boat over and do the same on the interior. First sand lightly,

click to enlarge


Apply flat latex white now and then sand lightly.

click to enlarge


Another coat of flat and then two coats of semi gloss.

click to enlarge


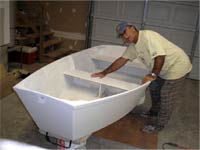
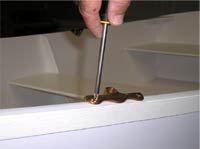
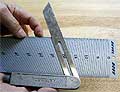
I did forget to mention that you need to drill a 3/8" hole, center of the fore transom, 2" down from upper edge. This is for the bow line or painter. You just run the end of a 3/8" by 10 or 15' piece line through the hole and tie a figure eight knot on the inside


I then take a light buff color to highlight the rub rail, to finish the painting out

click to enlarge

 
Now that your painting is finished we add two sets of bronzed oarlocks. The reason for two sets is that if two people are in the dingy it's easier to row from the forward station. I set the oarlocks 7" aft or back from the mid and forward seats.

click to enlarge

 
Then carefully pre-drill your screw holes so you don't go all the way through the hull.

click to enlarge

 
Then set your screws. I use a hand screw driver to make the screws are set tight with stripping the heads.

click to enlarge


click to enlarge


Finally, put on your USMC T-shirt and stand behind your new boat for a picture.

Back to Part 1

More Articles by or about Bob Means: