| Part1
- Part2 - Part3 - Part4
Last time
we put in the light schooner’s new “bulkhead
4” in preparation for a full-blown motor well
rebuild. Now we’ll get the rest of the framing
done.
Cuttin’
Now that we have the new bulkhead to hold the hull
in its correct shape, we can remove the old one. For
jobs like this my favorite tool is the Milwaukee Tool
Saw-Zall. God, I love that thing. I got it for $40
at a yard sale. After a full career of work with a
sheet metal, it’s enduring my abuse with no
sign of giving up. This is a good example of high
quality tools being worth the money, particularly
used. The cheap Chinese imitations don’t hold
up to regular use. Dust gets in the bearings and they
fail.
OK, now that I’m done with the tool rant…
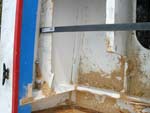
The first step is removing the hatch coamings. This
is straightforward saw-zall work, but a regular jigsaw
would work too, though it might be a bit tight near
the deck carlins. Of course a hand saw would be perfectly
workable as well.
 |
 |
Click
images for larger views |
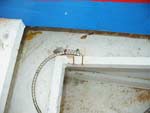
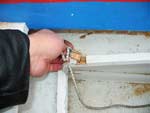
Then we run into a little problem. The screweyes
that hold the hatch cover shock cords are in the way.
I could just put a metal blade on the saw-zall, but
I’m too lazy. On the other hand I don’t
want to ruin the wood blade or have to unscrew them.
I remember what a pain it was to screw them in, using
a screwdriver to slowly “wrench” them.
So I cut a kerf on each side and chiseled them out.
Fast and easy.
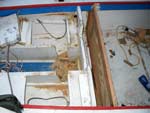
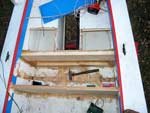
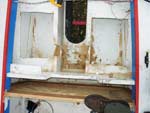
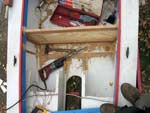
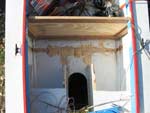
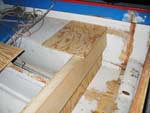
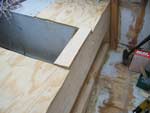
So here it is with the decks cut.
Time to get rid of the old motor well bulkhead. It
is quickest to do it in steps. First cut through the
plywood and leave the framing along the edges. There
will be a few small parts where you can’t reach
with a saw-zall. That’s where Mr. Sledgehammer
becomes your friend.
You can see how I placed my hatch covers stupidly
for this. In fact I placed them stupidly for anything,
since they’re all but impossible to get to with
the motor in place. Maybe this is good, since it doesn’t
tempt me to overload the stern. Either way, we’ll
be moving these hatches.
In any case, the object here is to cut the well and
decks in plane with the aft face of the motor board.
The new motor transom will tie into these panels at
that point.
Finishing it off seems easiest by cutting kerfs
into the remnants and chiseling out the waste. Be
sure that chisel is sharp and work slowly! You’ll
have to drive some fasteners outward through the sides
and bottom. So again I had to drag the boat partway
off the trailer.
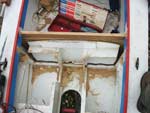
Note here one of the nice features of the motor well
during a refit. A trash can placed under the slot
makes cleaning junk out pretty convenient. Just sweep
it all out the slot. Nice!
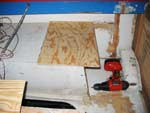
A belt sander finishes it up nicely, where it can
reach. Of course the nail holes are easily plugged
with epoxy putty.
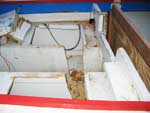
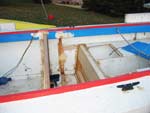
Looking pretty empty back there. Perfect. Now we
can build a proper motor well.
Building anew
For a transom that holds a motor, Jim Michalak recommends
1/2” plywood, reinforced at the top with a 2x6
running the entire width of the boat. So that’s
what we’re doing. We use the same tick stick
method to make a bulkhead that comes out flush with
the underside of the decks. As always, fit oversized
when possible and mark directly from the boat.
Here, those who have not yet built the schooner are
in luck. Here’s how you build the bulkheads
I used. That is way easier than retrofitting like
I’m doing here. Most importantly, remember to
draw the BH4 lines 6” forward of the original
location on your side panels.
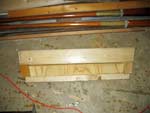
We want the top to come out just below the decking,
so the new decking can rest on top of the motor bulkhead.
We cut this to fit, then add the motor clamp board.
I really have no idea how I cut this too short. (PL400
and redundant framing saved me.)
This lets us fit the new deck pieces. I cut ¼”
plywood to roughly fit, then traced the shape of the
opening from underneath. I decided to leave excess
overlapping the motor board, then trim it later. Since
this bulkhead can slip into place with framing attached,
we now remove it to nail and glue the motor clamp
board. Actually, I had to remove it so I could trace
the cut lines onto the underside of the decks.
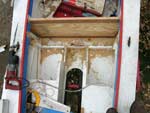
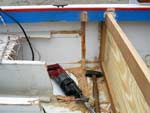
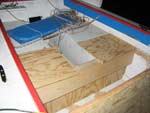
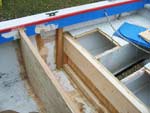
Time to get back to the framing of the motor bulkhead.
Next we add the bottom frame and fill-in pieces on
the sides. No reason not to fasten it to the boat
now, so I do. Note the short nailer strips on the
aft upper corners. There are to support the cut-off
decks that come flush to the bulkhead’s edge
at that point. I could have cut the decks back further,
but it is awkward to put in fastenings under the side
deck. So I left as much of the original as I could.
(For those who have to work after kids go to bed,
take note that I fit the side pieces and nailers at
night, beveling them with a hand plane. And screws
are quieter than nails!)
 |
 |
 |
 |
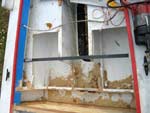
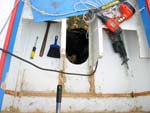
Hey! I put fasteners into the end grain of the top
and bottom frames on that bulkhead! That will be weak!
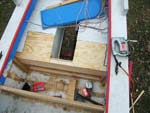
This is true. But I’m adding yet another vertical
frame right in front of them. This one fastens to
both the chine and the gunwale, making a brutally
strong motor bulkhead. Overkill indeed for only 5.5
hp. The only trouble is that the full-height frames
create corners that want to hold water. After the
decks are on, we’ll glue in small plywood triangles
to eliminate this problem.
Also note the nailers I added under the cut edge
of the decks, to join old to new. But don’t
put the new decks on yet, because you will need to
have some kind of opening in the aft decks to drive
screws. I did this by leaving off the new deck pieces
until the last moment. But you could also do it by
laying out the new hatches earlier. I wanted to wait
so I could think about where I wanted them after seeing
the motor and all the steering mechanism in place.
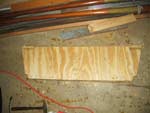
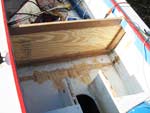
Now is a good time to cut those deck parts to fit.
Note that the top of the motor board is not square.
We need it to be, or the motor will mash the corner.
No problem. I like to cap these with a strip of solid
wood anyway, to protect the end grain of the plywood.
So we just rip that strip with a bevel to “undo”
the existing bevel. Here it is being dry fitted.
Next time we’ll finish the project.
Rob Rohde-Szudy
Madison, Wisconsin, USA
robrohdeszudy@yahoo.com

Click
Here for Other Articles by Rob Rohde-Szudy
|


 Stainless Screws