Part One
Part
2 - Part 3
Due to the e-mailed interest in the design, and the
plan sales of the original 10 foot version of the
Hudson Springs Pram; I worked
out the details and drew up the plans for it's little
brother, the 9 foot HSP FlyCaster.
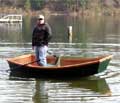
This boat was designed for people looking for a smaller
and lighter hull to roll, carry, or drag to their
favorite fishing hole or stream.
This will be a solo boat. I am not going to add any
drawings of extra bulkheads for more traditional styles
of bow, center, and stern seats. This will only have
the single pyramid tower in the middle of the boat
to accept one of the swiveling/removable seats you
can get at your local outdoor store, or at Cabelas®
and other sports and fishing gear online retailers.
If you would like to add other structures to the interior
of the hull; I only ask that you balance the weight
distribution of any changes you make between the front
and back of the hull before you attach the seat pyramid.
You don't want to upset the balance of the boat as
it is designed. The plan instructions will explain
how to compensate for any changes you may make to
the basic design.
One of the things I would suggest, is to download
and construct both the 9 and 10 foot version's of
the PDF model files. That way you can see the physical
difference's in the size of the two boats as they
are sitting side by side. The FlyCaster
will be several pounds lighter, and fit in the back
of smaller pickup trucks due to it's smaller footprint.
You will also notice comparing the models, that the
FlyCaster still has plenty
of waterline surface area to carry a lot of weight
and not be a tank to row. I think that it could even
be made from 4mm plywood with some fiberglass covered
polyurethane foam stiffeners added to the corners,
sides, and bottom panel; and lower the weight enough
to become a "car topper".
I decided to use sheets of 5x10 plywood again, as
I am in a hurry to get as many prototype hulls of
my newest designs built as possible. My local supplier,
EdenSaw Woods still had a good price on 5x10 sheets
just a few dollars more than the 4x10's, and I can
always use an extra ten square feet of cheap okume
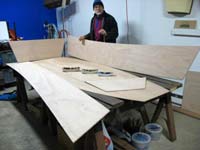
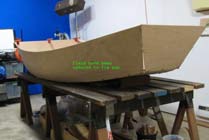
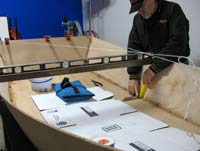
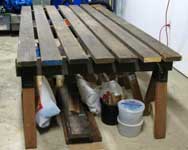
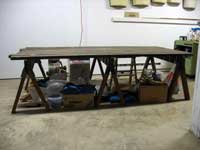
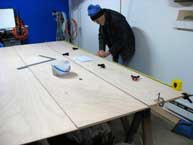
1088. I've added a couple of photos of my work platform
to show you what's turned out to be a good solution
to the home builder. The platform can be taken apart
and stored between projects; or sold to your friends
and neighbors when they see you out in your new boat
and are struck by one of the seven sins.
 |
|
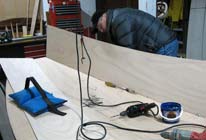
I had a friend who wanted to learn how to make his
own FlyCaster come over and watch/help me with this
project. It was good for me to explain what I was
doing, and to see if I needed to change anything in,
or add more information to my written instructions
for constructing the hull. I figured that if I could
fully explain the lofting and layout process, the
rest of the instructions would be easy to follow.
I had already cut a 19" x 10 ft strip from one
of the plywood sheets and I explained about what may
or may not be the good/bad sides. We decided what
side was what; lined them up along the "good"
edges and clamped them tight. I also explained about
checking the "long" edges for straightness
by using a tight cord held around the corners. This
plywood pair of edges was ok, but I have had plywood
sheets (foreign made) that were not even close. Once
we were happy with our materials and edge squareness,
we continued on.
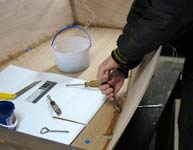
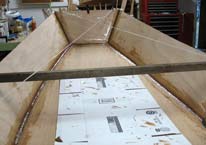
So we started the lofting by laying out the one foot
"station lines" that are shown in the plans.
This is as it seems. Just mark down with a pencil,
the station lines you have measured, starting from
the stern end of the hull. On a hull with a varnished
interior, you will want to keep the pencil marks to
a minim, so use a little preplanning and practice
with bits of masking tape. You can even do all your
lofting on masking tape, if the strips are located
and centered on the station line marks. Because this
hull has a single panel bottom, you will have to layout
the station lines on that plywood sheet as well.
 |
|
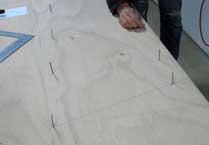
The first locations to mark from the plans on the
side panel pair, were the stern corner points. The
plans list only one point to mark, as the top corner
starts at the edge of the plywood sheet. The plans
call out "down and over" measurements. Down
from the "top" (long edge) and "over"
from the "left" (stern edge). Once that
spot if found and rechecked, a brad nail is driven
into the plywood as vertical as possible. Being as
vertical as possible, is important later when driving
the brads for marking the lines for the curves. Any
leaning of the many brad nails can make "marking
and fairing the curves" harder to do.
Once the sheer and chine edge lines have been measured,
marked, and the brads driven to mark their locations,
its time to break out the lofting batten. Mine is
made from a strip of 3/8" Philippine mahogany;
left over from ripping out rail material for my first
boat. If you rip out the rail material for your boat
first, you will have the batten you need for this
process.
Be careful that you pre-plan the widths you will
rip out and the width of the material you start with.
The 1x6x12's that I get from my local supplier can
vary in width from 5 ¼" to 5 ½".
The other "standard" widths vary between
boards in the same stack too. Do some test cuts with
your saw and the blade you will use, to determine
the kerf (saw cut width) of that setup and the total
number of rail strips you can get with each successive
pass. Have a friend help you guide the material though
the saw if you can. BE CAREFULL!
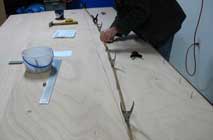
Now lay the batten along the "chine" row
of brad nails. Put the batten on the "top"
side of the brads so the batten has to bend "down"
at the ends and presses tight against the row of nails.
Add a few small spring clamps at various locations
along the curve to hold the batten to the nails. How
does it look? Add or remove clamps along the length
of the batten to see if it lays tight or if it wants
to stand away from a few brads. Look again along the
full length. Make sure to add a brad nail beyond the
"bow end" of the batten to maintain the
curve past the end of the boat. This aids in maintaining
the "curve of the arc" at the forward end
of the lofted line. Take a good look at the curve
from both ends and from various points in between.
Does it still look good? Does a nail need to be moved
a hair? Measure from the edge again to recheck the
location of the brad nail. Still looks good?
 |
|
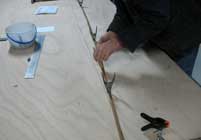
Take a pencil (red, blue, green) and lightly mark
on the "lower" side of the batten, the curve
of the arc. Remove the batten and look at the line.
Is it fair? If you are happy after a couple of look
sees and adjustments, use a lead pencil and mark in
the final arc of the curve. Do this again on the sheerline
curve; then use a straight edge to mark the cut lines
for the bow and stern ends of the side panels.
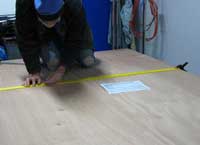
One thing you need to remember to do; is to measure
the "edge length" of your lofted panel edge.
Take your measuring tape and hook it over one of the
end nails and run it back on the "outside"
of the brads to the other end. Check it a couple of
times and mark the length down on the edge of the
panel itself. Do this before you pull the nails. After
you have lofted up the mating edge on the next panels;
measure the "edge length" again to see it
they are within ¼" of each other. The
side panels are measured and cut together as a matched
pair. So if the bottom panels side edges (both should
be the same) are a little longer; add that fraction
of extra length to the lower bow brad nail. The change
in bow angle rake will not be noticed.
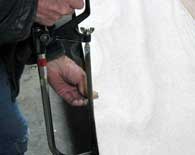
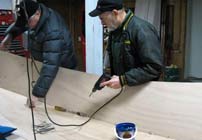
We repeated the above steps to layout the bottom
panel. The bow and stern panels measurements were
lofted onto some of the leftover plywood. They were
checked for parallel top and bottom lines and the
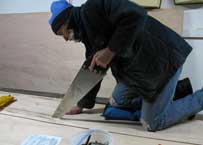
correct angles for the side cuts. Next it was time
to cut out the individual bottom panel, the end panels,
and the side panel pairs. I had taken my handsaw in
to have the teeth reset and sharpened; and was quite
surprised when I made the first stroke. I knew it
was different when I got it back and ran my fingers
down the side of the teeth and could feel the increase
in the "set" of the teeth. But I really
knew it was different when the saw made a 4"
cut through one half inch of marine plywood with one
stroke. WOW! It never took me that long to cut out
a boat before, but now I spent more time moving the
sheets around on the platform, to keep from cutting
it in half, than I did in the actual sawing of the
wood. I think I had the whole boat cutout in less
than thirty minutes.
 |
|
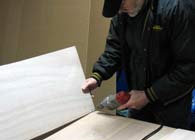
While the side panels were still clamped together,
I took my hacksaw and made small cuts at the “station
marks” along the sheerline, and deep enough
to survive the shaping of the rails. That way I always
have an exact reference on both sides of the hull
to measure from, when I install any of the interior
parts. Such as the oarlock socket mounting blocks.
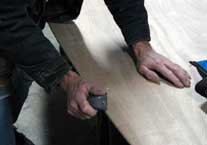
I took my big hand rasp and beveled all the the mating
edges on the inside of the panels and then marked
the stitch wire set back lines, plus the two inch
and three inch glass tape edge lines. This was the
first time I tried using pencil lines to help align
the glass tape as I placed and wetted them out. If
you are going to just epoxy and varnish the interior,
I would use a "marking scribe" as opposed
to a pencil. If you paint the interior, the pencil
works fine. Either way, they really help to keep you
aware of where the tape edges should go when you place
them, and whether or not they shift positions as you
wet them out.
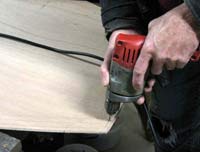
Next was the drilling of the wire tie holes. I only
pre-drill around the edges of the bottom panel. I
drill the holes for the side and end panels as I fit
them. That way I have more control over the side to
side movement of the panels as I wire them together.
 |
|
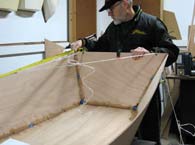
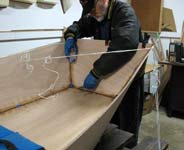
With all the panels prepped and ready, it was time
to wire up the hull. I started at the stern corner
and worked my way forward. I didn't put any ¼"
bolts in yet, as I wanted to see how the corners at
the bow would match up. They didn't. I knew I had
an offset when I measured the edge lengths after I
lofted them; but with a prototype hull I didn't know
which direction the error would be in. With this hull
I had to trim off a bit of the forward edge of the
bottom panel to make it fit (creating the gap you
see in the photo). I have since changed the plans
and added some extra length at the lower bow corner
of the two side panels. This will not happen to your
boat, and is really not a problem with this one. The
EZ-Fillet and glass tape spans
the gap and will never be noticed.
I showed Bob what I was doing with the drilling,
wiring, and bolting and let him do the last 80% of
the boat as I busied myself getting the epoxy ready
for the "jump stitching".
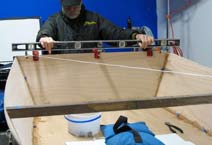
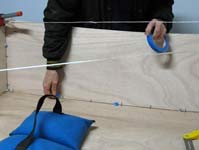
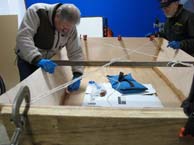
After the hull was wired up, I checked the hull for
bow and stern racking (corner to corner measurement
check), and the ends being level with the bottom panel,
using the 4ft level. The photos were taken after the
fact to show what I mean, but the hull was level and
square before I brought out the epoxy.
Be sure to check the “side to bottom panel
angle” on both sides so the boat doesn't have
a permanent lean to it. Tie a cord at the top of the
wide angle side and to a tie wire on the bottom of
the narrow angle side. Tighten the cord until they
are equal and check the rest of the hull again for
level and square. Maybe a couple of times before you
wet the seams and apply the jump stitch.
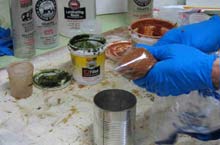
I had forgotten to place the epoxy containers in
a warmer room and had to live with their lower viscosity.
Tough love. I mixed up some straight SilverTip epoxy
to coat the cut edges of the wired together plywood
panels. You don't want the plywood's end grain to
suck out all the juices of the "jump stitch"
fillets and starve the joint, and thus weaken it.
Make sure you cover the bolt heads with some tape
so you don't ruin them.
 |
|
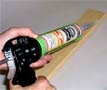
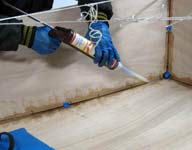
I also tried out something new for doing the "jump
stitch" on this hull. I had used GelMagic before
as a super bonding agent, but I had never used it
as my jump stitch material. I had always used bagged
EZ-Fillet, and squeezed out a small bead and pressed
it into the gap with a popsicle stick. This time I
used GelMagic
in System Three's new uTAH tube, with the mix in the
nozzle tip, for my jump stitch material. I was done
with all the jump stitches before I could have finished
mixing and bagging up the first batch of EZ-Fillet!
And I barely made a dent in the amount of material
in the tube! I gave the used tip a fitting burial.
So young, so little time. I wished I had already cut
out the side bulwarks and the seat pyramid ahead of
time, so I could have used that tip on them too. If
they can't fine you handsome, at least they can find
you thrifty. The uTAH tubes also come standard, with
a nifty little two hole tip that fits on the end instead
of the extra mixing nozzle. You can squeeze out as
little or as much as you want, in a correct 2:1 ratio
with that end fitting. Because the holes are separated,
they never cure and plug up.
 |
|
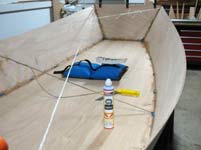
I could have removed the wires and bolts the next
day, but with the lowered temperature in my shop,
I waited an extra day to make sure the jump stitches
were fully cured.
 |
|
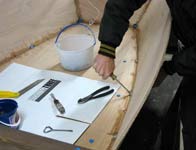
Bob came back for the seam filleting step of the
construction, and I gave him a demo of the mixing
and bagging of the EZ-Fillet. But first we had to
mix up and presoak the plywood along the seams and
out to the outer widths of the 3" glass tape
for a better stick and the "starved joint"
thing again. A quick fillet application 101, and I
let him have at it with the rest of the hull. I find
that people have more capabilities than they think
they have, and I enjoy helping them on that discovery.
Other than trying to shave with a chainsaw, not too
many things are going to jump out and bite you the
first time you try them. It's just that first move
that's the hardest to make. As a Forester in the rugged
Northwest, mine was getting out of the truck and walking
into the woods by myself for the first time. (pre-cell
phone days)
 |
|
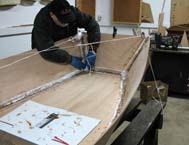
After the filleting was done, it was time to lay
down the first layer of 2" glass tape. I like
to apply the tape after the fillet material has gone
a little "green". Firming up, but still
sticky. With the 2" tape, I like to make 45 degree
cuts on both sides of the tape's end to make a point.
The points let the ends of the three tapes blend into
the corners and keep from piling up. This is followed
by a complete wet out of the 2" tape. While the
2" tape was still wet, I started rolling out
the 3" tape. I found it very easy to place the
2 and 3" tape with the guide lines I had made
earlier. Everything was neat and tidy. A nice tape
end trim in the corners and a full wet out of the
3" tape completed the hull and this portion of
the story.
 |
|
Thanks again for reading my stories and the comments
you make. More photos of the construction of the 9.0
FlyCaster can be seen at www.flickr.com/photos/flycaster
I will be adding a lot more photos than are inserted
here, so visit the site often as I construct the hull
over the next several weeks.
Warren Messer
Red Barn Boats

Other Articles by Warren Messer
|