|
|
| Send
items to chuck.leinweber@gmail.com
for inclusion here next month.
The Treasure Chest is a place to put those cool sailing,
cruising, motoring, boatbuilding or boating tips you have. Send
us your ideas... We just need a photo and a short description.
This time we have...
|
Cheap, Disposable 'Touch-up' Brushes
I've been doing a lot of little painting and varnishing jobs lately. Touch ups and fiddly little things. The type of jobs where more paint/varnish is wasted in the brush than is actually applied to the boat/part. I hate that. I suppose a smaller brush is the answer, but I also hate cleaning brushes. So, I've been experimenting with different techniques. I tried wearing a glove and using a shop rag rather than a brush, but that doesn't work very well sometimes. I tried folding up a bit of rag and holding it with a clothespin, that's better than a glove, but the rag still isn't very "brushy". I tried clipping the rag with scissors to make "bristles", but they were too flexible.
The best I have come up with so far is poly rope. The cheap yellow stuff.
https://tinyurl.com/3eu7um7
I simply cut off an inch or so, clipped onto one end with a clothespin and then frayed the other end. It worked well for paint, I haven't tried it with varnish yet. When done, simply hold over the garbage, squeeze the clothespin and let the rope drop, save the clothespin for re-use... as a handle, the Mrs might not want it back for clothes. At ~$8 for 100 feet, that's 1200 disposable 'brushes' for $8!
Seth |
Rod Leash
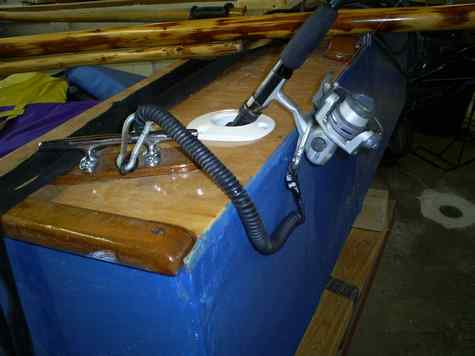
I had a friend that lost an expensive fishing rod on a recent rough water fishing trip and I came up with an idea for a rod leash after looking at some commercial made ones online. I like to do things cheap and easy so here is my idea that only takes 5 minutes to make. Here we go!!!
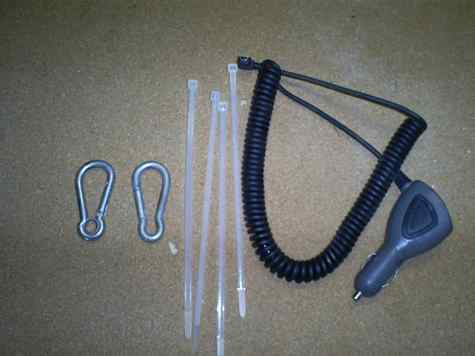
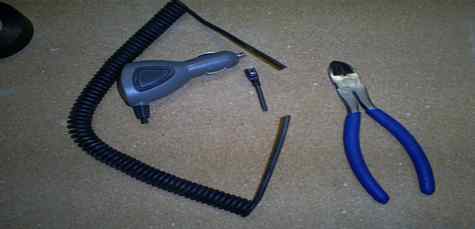
First things first.. We need to gather a few things. A pair of wire cutters, a roll of electrical tape some zip ties, a couple of snap clips and an old phone charger.
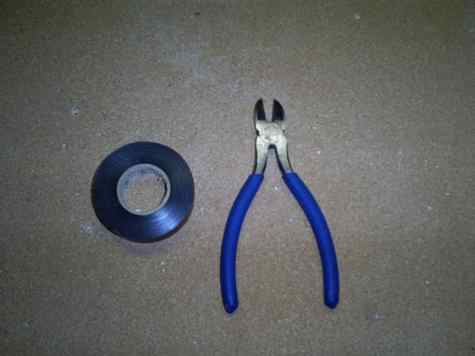
Next cut off the ends of the charger with the wire cutters so that you have 2 straight ends on the cord.
After you have the cord cut fold one end of the cord through the snap clip and secure it with 2 zip ties and trim the tails off.
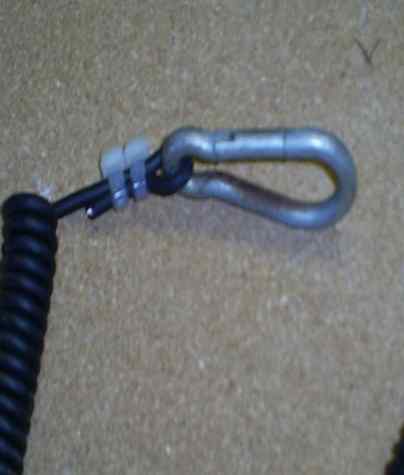
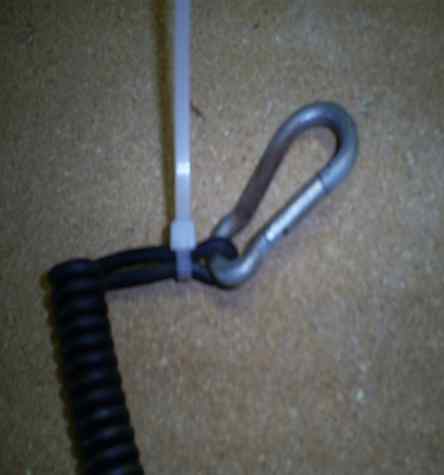
Finally wrap the ends with electrical tape to cover up the zip ties and your finished!

I have a couple more ideas that I am working on for "fishermen on a budget" that I'll send to you soon. If anyone has any questions they can post to https://groups.yahoo.com/group/dwforum/
Thanks for a great community here at Duckworks!
Wade Thweatt, Tolono IL |
Setting up Shop
I made a nice bevel gauge using a 6" stainless ruler. There was a hole in the top to hang it on a nail, and I just ripped and planed two pieces of oak to the same width glued them together at one end, and drilled the other to take a bolt and a wing nut. Works great and the scale on the ruler comes in handy sometimes.
Brian A |
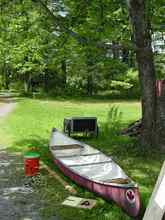
Tim Weighs the Canoe
Gas prices encouraged my wife and I to get rid of the gas hog that we used to pull our boat and cargo trailers. I put roof racks on Flytte (the vanity plate on the older of our two Toyota Corollas - Norwegian for "moving around a lot" cognate to the English "flit", locally pronounced "Fly Tie") to get our canoe and kayak into the water. The kayak has the stability of a log for my weight so it's been me and the canoe.
Besides being overweight, I'm 60 years old. Every time I go out with the canoe I wake up the next morning wondering, "Where's the truck that hit me?" This let me to wonder, "How much does that damned thing weight?"
Two ways of answering this question occurred to me, a homemade scales or drive it to the Hartford Recycling Center fifteen miles away and talk the attendant into weighing Flytte with and without the canoe. Homemade scales seemed easier.
|
Ropes, tape, futility knife, a board for the scales yard, a bucket of water weighting 42 lbs, the canoe, writing stuff, and a convenient overhanging ash branch. |
|
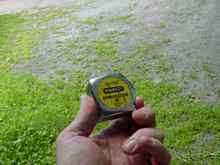
Oh yeah! The measuring tape off my wife's desk. I'll put that back when I'm done. |
I'm told that when I was five I was found wandering on the stairs of a Roanoke Rapids, North Carolina department store singing, "The Drunken Sailor" with great feeling. The running bowline is unquestionably the first knot I sang about.
|
"Heave 'im by the leg with a running bowline, Earlie in the morning." |
|
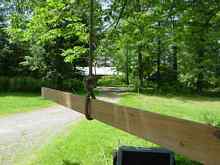
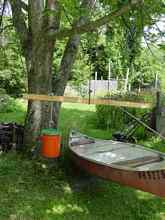
The yard is up and balanced. |
I was offended to see that the 42 lb. bucket hung roughly twice as far from the center pivot as the canoe's rope. Three times or greater would have been more pleasing to my ego. Sigh. Getting the measurements was the point of this exercise so I guess I'll believe what I got.
The measurements: The 42 lb bucket hung 23.5 inches from the center pivot. The canoe hung 12.625 inches from the center.
Calculation: 42 lbs. times 23.5 divided by 12.625 equals the weight of the canoe.
Answer: Tim's canoe weighs 78.18 lbs.
Tim Ferguson |
Waxed Paper
I was able to reduce sanding to almost nothing using wax paper. Whenever I completed some epoxy work, I covered it with wax paper and smoothed it out by hand. After the epoxy set, the wax paper pulled off with little effort and left a smooth surface. Then any sanding could be done by hand. Sanding by hand and wet sanding reduce the air-born bits dramatically.
Carl
Another tip is to use a scraper rather than a sander. You
tend to get shavings rather than dust.
Chuck |
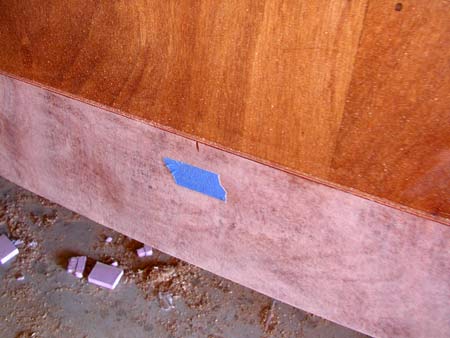
Tape
Have you ever been doing what you thought was the final sanding only to find a ding that you are compelled to apply goop to - only to be unable to find it once you have the goop mixed and ready? Try marking the blemish with a piece of masking tape. You can remove it once you have sanded the filler down later. The best thing is that it won't bleed through the paint like a felt marker will if you use that to mark the spot. Don't ask me how I know that.
Chuck |
Cube Beads
We have a tandem kayak which has a pair of lines - one raises the rudder and the other lowers it. They both run through a jam cleat and are hard to distinguish since they are terminated with identical round beads.

One of your fine two cent beads fixed all that - the cube is easily distinguished from the round bead by feel – important since the cleat is behind the cockpit and so most changes are done by touch. In fact the cube is the best shape for this job because of its feel. Plus in our case the color somewhat coordinates with the kayak.

As soon as the kayaking world is aware of this, the demand for your cubic beads will grow so that you’ll need to raise their price to maybe as much as three cents.
I bought more of your cube beads and will use the rest to teach multiplication to our six year old.
Keep up the good work – good prices and speedy delivery.
Alex |
Epoxy Dust
Kenneth Gromme's post did a good job of describing the process in detail using tape. This method uses glass cloth and doesn't use peelply in the mix because I feel that you should do the chine work in particular, as one operation. There will be many small lengths of tape used but they will all be laid with the epoxy is in its "green" un-cured state, including multiple layers as required.
Basically what you do is lay out a piece of plastic several feet long and wider than your glass cloth on your work table.
Then weigh your glass cloth and mix that amount of resin, in weight.
Place the glass cloth on the plastic and carefully pour the resin out on the cloth.
Next cover glass cloth with another piece of plastic.
Now the resin and glass cloth are trapped between the two layers of plastic.
You can now use a sqeezee or roller to evenly distribute the resin throughout the glass cloth, making sure that the plastic on the work table is taped down on the ends will help with this. You may have to peel back the top layer of plastic and add a little resin to dry areas.
Now you can begin cutting your bias strips.
You apply the strips by peeling back one side of the plastic sheet and then just pull it out of the way as you push the glass cloth and top plastic strip down to the work area.
Another nice aspect of the plastic transfer method is that you can save the unused epoxy impregnated glass cloth simply by rolling it up and storing it in a freezer. This saved poor man's prepreg can be used many weeks or months later by pulling it out of the freezer and letting it warm up so that it can be used for repairs or new construction on another project.
Denny |

 |
|
|
|