| Part One - Part Two - Part Three
Part One
After years of building and sailing boats, I have arrived at age 75 still having a desire to find another project that I could bring to life. At this point, with 29 boats built to my credit, I have found that desire has manifested itself in a great interest in small boats, as they can be more easily completed and generally require less money be spent in their completion.
This feeling that I had can be further refined to specifically encompass small cruising boats. While open sailboats are fine and their designs are quite abundant, my fascination leans more to small cabin type sailboats. The idea of having a small cabin that allows one to obtain shelter and even allows over-nighting in a cozy berth has always dominated my thinking.
While these designs are somewhat less available in small size configurations, there are a few that may typify the type. The two that were closes in size and category are the West Wight Potter 14 and Compac 16, as shown below.
With these thoughts in mind, I spent time searching thru books, magazines and the internet to find something that would strike my fancy and give me a project that could become number 30 of boats that I have built.
I had just about given up on the idea of finding what I wanted, mainly because the 12ft - 14ft range just didn't offer what I would consider to be a suitable cruising design.
Then one day, while searching the internet, I came across a 13ft design out of Poland, called "Sztrandus" that really struck me as the answer to what I was looking for. After careful study of the design, it was exactly what I had in mind. It looked like I could get 2 - 6ft 6in bunks, a port-a-potty, galley area and self bailing cockpit all in a 13ft boat. Soon it became something that I knew I had to bring to life.
The plans were free on the internet, but I soon found out that free did not mean that they were going to be easy to use, as they were shown only in Polish or a poor translation to English.
Although it is always nice to have plans that you can easily read, the most important piece of information to have is a usable table of offsets. An accurate table of offsets is all one really needs to build all of the needed frames.
In this case the table was available in a metric format. Metric measurements are not a problem, as I have built a few designs using them. As a matter of fact I have grown to like using metric's as it is quite accurate when using millimeter measurements as opposed to Inch & fractional inch measurements. Of course the proviso is that you need to have a good metric ruler. In our case we are very close to Canada for a source, but they are available thru Chuck at Duckworks.
At this point I had studied the plans sufficiently to get started on the real work of building the boat. The beginning step was to get the table of offsets turned into real frame/station shapes. This was accomplished by drawing these full sized on poster board. I think it is very informative to get a look at the shapes of the frames to get a better feel for what the boat should look like. I will stress that this process should be done as accurately as possible as the entire boat shape will be determined by these simple lines. Take your time and double check every measurement.
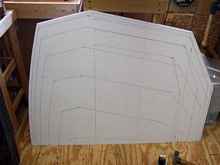 |
The next step entailed laying the poster board on the wooden floor of my shop and driving a small finishing (no head) nail at the outer points of each specific frame, starting with the smallest frame first. The poster board was then lifted off the nails and the remaining nails were connected with pencil lines thus giving a full size shape on the floor. Because the board showed only ½ of the real frame as the other halve is a mirror image, the board is flipped over at the center line and the process is repeated.
Using the frame shape, wooden pieces were cut and glued together using waxed paper under the pieces to create the individual frames.
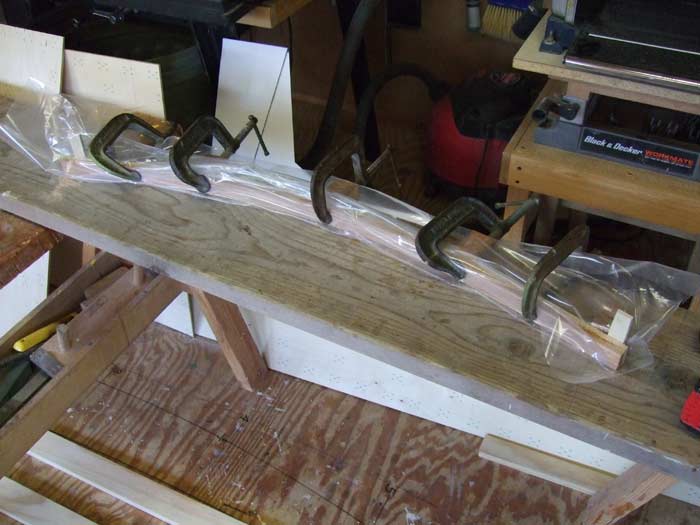
The tops of most of the frames were laminated to the curves obtained from the same poster board drawings done in the same way as the rest of the frame.
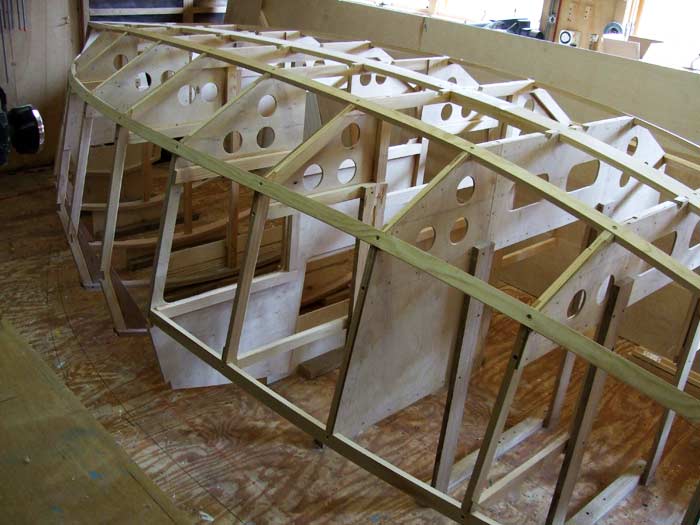
This whole process was repeated for each frame until each location was complete, to the point of including plywood reinforcements, interior pieces, bulkheads, limber holes and even the notches on the frame corners where stringers will be placed. From the table of offsets each frame was marked with a waterline across the frame. This line will be used to position each frame correctly when they are set up on the build floor. Completed and stacked together, I could really start to get a feel of a real boat at this point.
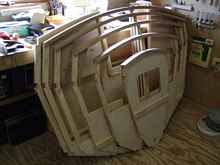 |
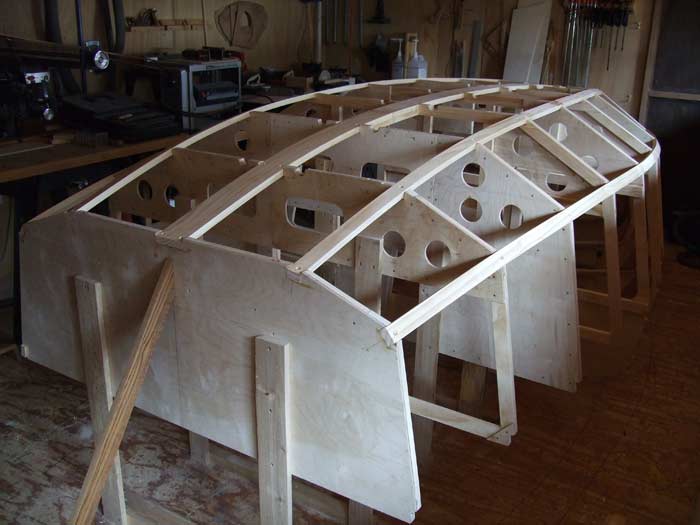
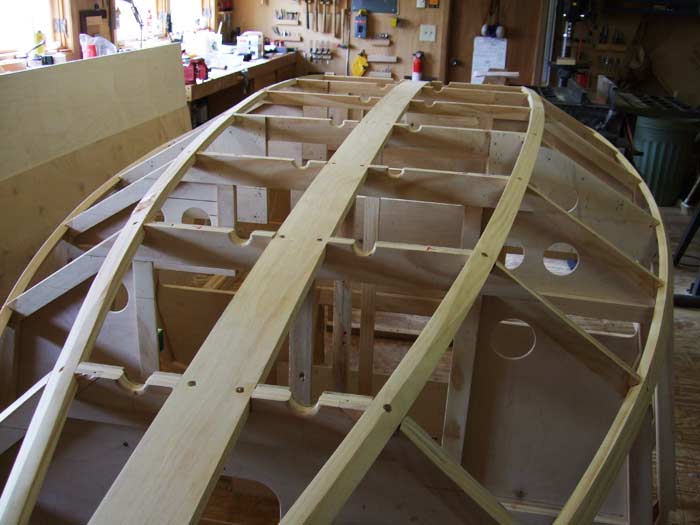
With all the frames completed, the time had come to place them in a way that would allow the boat to be built. The floor was accurately marked first with a center line and then with station locations that were shown on the plans perpendicular to the center line. The frames were then supported in an inverted position by temporary supports that were securely anchored to the floor. The height above the floor would reference the waterline mark on each individual frame. The overall height above the floor was determined so that the entire structure was at a good working height and enough space was allowed so that I could crawl under the structure during construction for additional work during planking.
Next time: Planking
|